
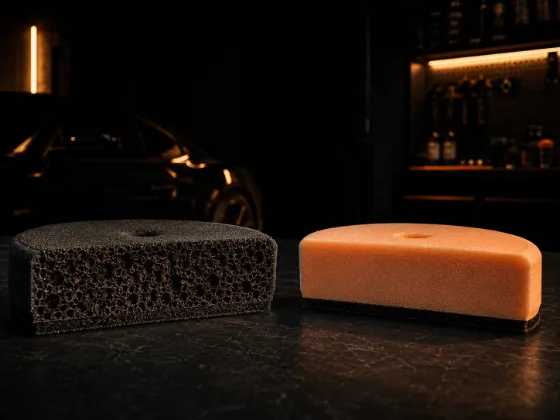
You have a dual-action polisher and a bottle of compound. What pad goes on it? If you don't know the answer, you're probably using the wrong one — and the pad you choose matters almost as much as the compound or polish itself.
Foam pads are categorized by their cutting ability — how aggressively they work in combination with the product on them. The categories are cut, polish (sometimes called finishing), and finishing (sometimes called ultra-finishing or glazing pads). Understanding what each does, and why, lets you choose the right combination for the job instead of guessing.
How Foam Pads Work
The abrasive work in paint correction happens when the compound or polish you're using — which contains micro-abrasive particles — is distributed across the paint surface by the pad. The pad's job is to hold, distribute, and apply consistent pressure with the abrasive product.
The foam cell structure of the pad affects how this happens. More aggressive pads have open, larger foam cells that release product more freely and create more heat and friction against the paint surface. Less aggressive pads have tighter, smaller cells that meter product more carefully and generate less friction. The pad's porosity and density also affect how it compresses against the paint — a firm pad maintains consistent pressure across its face even on flat panels; a soft pad conforms more to contours.
This means cutting power in paint correction comes from two factors: the abrasive in the compound, and the aggressiveness of the pad. A cutting compound on a finishing pad delivers far less actual cutting than the same compound on a cutting pad. A finishing polish on a cutting pad can behave more aggressively than intended. The combination matters.
Cutting Pads
Cutting pads are designed to work with compound — the most abrasive product in a paint correction sequence. These pads have large, open cells that allow compound to be distributed aggressively and generate maximum friction with the paint surface. They are firm and dense, maintaining consistent pressure across the whole face of the pad.
Cutting pads are typically yellow, orange, or red (though color coding varies by brand and isn't standardized). They are used for:
- Heavy swirl mark removal
- Scratch leveling (surface scratches that compound can reach)
- Oxidation removal
- Water spot removal (heavy, etched spots)
- Any correction where you need maximum material removal in minimum time
The tradeoff: cutting pads leave behind more visible polish haze. After working with a cutting pad and compound, you typically see micro-marring or haze in the paint where the compound cut. This is normal — the final result isn't assessed after cutting, it's assessed after polishing and finishing. The cut pad's job is maximum material removal, not a perfect final finish.
Cut time with a cutting pad and compound: you're spending time removing material. Work one panel at a time, use moderate-to-firm pressure, and overlap passes. Don't try to rush to a final finish on the first step.
Polish Pads
Polish pads — sometimes labeled "polishing" or "medium" pads — are the middle tier. They work with polishes (less abrasive than compounds) and can also be used with light compounds. These pads have tighter foam cells than cutting pads, generating less heat and friction. They're softer and flex more easily on curved panels.
Polish pads are typically white or blue (again, brand-dependent). They are used for:
- Light swirl marks that don't require compound-level cutting
- Removing the haze left by the cutting step (working with a light polish after compound)
- Single-step correction on paint in reasonable condition
- Pre-coating paint leveling before applying a ceramic coating or wax
On well-maintained paint with light swirls, a polishing pad with a light polish is often all you need. Not every car needs compound. The goal is always to use the least aggressive combination that achieves the result — every correction step removes paint, and paint doesn't grow back.
Finishing Pads
Finishing pads are soft, dense, and closed-cell — they don't cut. They're not designed to work with compound. Their job is to burnish the final product into the paint surface and remove any residual haze left by the polishing step, leaving a high-gloss, defect-free surface that's ready for protection.
Finishing pads are typically black, grey, or green. They are used for:
- Removing residual haze after compound and polish steps
- Applying finishing polishes that contain diminishing abrasives or light fillers
- Applying glaze products by machine
- Final paint refinement before ceramic coating or wax application
Finishing pads generate very little heat and very little abrasion — they work by very gentle buffing rather than cutting. The goal is a perfect surface that shows maximum gloss and depth.
One clarification: some "finishing polishes" contain diminishing abrasives — abrasives that break down into smaller and smaller particles as you work them, starting with light cutting action and finishing with a high-gloss result. These are designed for use with a finishing or polishing pad. They're different from "glazes," which contain no abrasives and simply fill and enhance gloss optically.
Lake Country, Meguiar's, Rupes, and Others
The main thing to know about pad brands is that the color coding is not standardized across manufacturers. What Meguiar's calls a "cutting pad" may be orange. What Lake Country calls the equivalent is yellow. What Rupes calls their most aggressive pad is green.
When buying pads, read the product description rather than relying on color. Every quality pad manufacturer describes its intended use — "for use with heavy compounds," "for light polishing," "ultra-fine finishing." Take them at their word and match the pad to the product and the task.
Matching Pad to Compound: Common Combinations
Heavy correction: Cutting compound + cutting pad. Maximum material removal. Expect haze to be cleared in subsequent steps.
Moderate correction or second step: Light polish or finishing polish + polishing pad. Light swirl removal and haze removal after compound step.
Final step / surface refinement: Finishing polish or glaze + finishing pad. Removes residual haze, maximizes gloss, prepares surface for protection.
Single-step on well-maintained paint: All-in-one compound/polish + polishing pad. These products contain compound abrasives and finishing agents together. They don't correct as well as a two-step process but are faster for paint in good condition.
Pad Care and Replacement
Pads get contaminated during use. Compound and paint residue build up in the foam cells, changing how the pad performs. Use a pad conditioning brush or stiff nylon brush to clean the pad face while it's on the machine — with the machine off — during a session. For a full clean, wash foam pads with a small amount of dish soap and warm water, squeeze out (don't twist), and allow to dry completely before the next use. A wet pad used with compound creates inconsistent results.
Replace pads when: the foam has torn or cracked, the foam has become permanently deformed, or the adhesive backing is failing and the pad spins off the backing plate. Quality pads washed and stored properly last a long time — cheap pads may degrade after only a few uses.
The Practical Starting Point
If you're building your first set of pads: get one cutting pad (for compound work when you have significant defects), one polishing pad (your everyday workhorse for light correction and single-step work), and one finishing pad (for final refinement before protection application). Three pads cover almost everything you'll encounter. Add specialties — spatter pads, wool pads, small-diameter pads for tight areas — as you learn what you specifically need them for.