
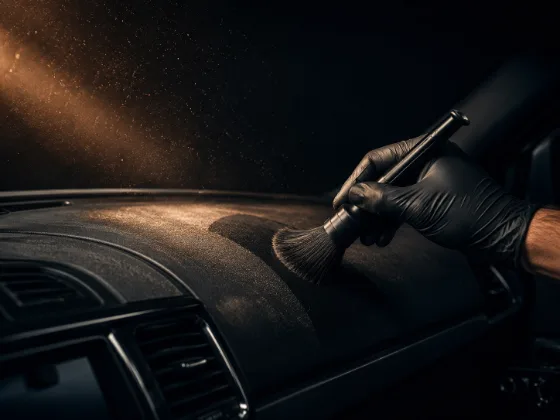
A clean dashboard is one of those things that makes the whole interior feel right — and a streaky, greasy, or dusty dashboard makes the whole car feel neglected even if everything else is clean. The challenge is that dashboards are made of multiple different materials that need different approaches, and most people are using the wrong product for at least one of them.
Why Dashboards Are Tricky
The average car dashboard might have five or six different surface types: textured matte plastic, gloss piano black trim, a touchscreen or display, soft-touch rubber or TPE plastic, genuine or synthetic leather, and fabric or Alcantara accents. Products that work great on textured matte plastic will leave piano black a smeared mess. Interior spray that cuts through grime on vinyl will trash a touchscreen coating. The wrong approach on one surface type negates your work on the others.
Beyond material variation, dashboards also get a specific contamination type that other interior surfaces don't: off-gassing film. The "new car smell" is partly the volatile organic compounds evaporating from plastics, adhesives, and fabrics in the interior. These compounds land on the inside of the windshield and on the dash top, creating a thin, invisible film that's slightly sticky and attracts dust. This film is the reason your dash top looks dusty again two days after cleaning it — the dust is sticking to the film rather than just landing on a clean surface.
What You Need
The key insight is to have separate products for separate surface types rather than one all-purpose wipe for everything.
Interior cleaner for plastic and vinyl: A spray or foam cleaner pH-balanced for automotive interiors. Choose a product that specifies "no residue" or "matte finish" — these formulations clean without leaving a sheen.
Screen-safe cleaner: A dedicated screen cleaner or a clean, barely-damp microfiber for the infotainment screen, instrument cluster display, and any other screen surfaces.
Detailing brushes: For vents and crevices before you wipe anything down.
Microfiber cloths: Multiple. Not the same one for all surfaces — separate cloths for screen, dash plastics, and soft-touch materials. Cross-contamination from a greasy cleaning cloth to a screen makes streaking worse.
The Order of Operations
Always start with dry work before wet work.
Brush out the vents first. Take a detailing brush and work through every HVAC vent on the dash. The dust and debris you dislodge will fall onto the dash surface below. That's intentional — you'll clean that next. If you wipe the dash first and then brush the vents, you're re-contaminating surfaces you already cleaned.
Then deal with button gaps and trim seams. Run the brush along the edge between the infotainment unit and the surrounding trim, around buttons, in the groove between dash sections. Again — all of this falls down onto the dash surface below. Fine.
Now wipe down the main dash surface. Spray your interior cleaner onto a microfiber, not directly onto the dash. This gives you control over how much product goes on, prevents overspray on screens and glass, and avoids soaking into crevices. Wipe in straight passes, top to bottom, working across the dash.
Use a slightly damp second microfiber to wipe off the cleaner — some products need this step, some don't, but it ensures no residue is left behind. Follow immediately with a dry cloth buff. This three-cloth system (apply, wipe, buff dry) eliminates the streaking that comes from letting product dry on the surface.
Matte Plastic vs. Gloss Trim
This is where most people make the mistake that causes streaking.
Matte plastic on a dashboard — the textured, non-reflective stuff that makes up most of the dash area — is relatively forgiving. Most interior cleaners work fine on it. The texture hides minor streaking.
Gloss and piano black trim pieces are completely unforgiving. Every fingerprint, every streak, every tiny fiber from the wrong microfiber shows clearly. The issues:
- Using too much product leaves a visible film as it dries.
- Using a rough or low-quality microfiber leaves scratches that are immediately visible in gloss surfaces.
- Wiping in circular motions creates spiral scratch patterns that catch the light badly.
For piano black: use the lightest possible touch. A barely-damp high-GSM microfiber (400+ GSM, soft pile) is often enough for light dust and fingerprints. For heavier contamination, a tiny amount of interior cleaner on the cloth, wiped in straight linear passes — not circles — then buffed off immediately with a dry microfiber. Take your time and use fresh, clean cloth surfaces frequently.
Touchscreens and Displays
This is the surface type where the most damage gets done by using the wrong approach.
Modern car touchscreens have oleophobic coatings (fingerprint-resistant) and anti-glare coatings. These coatings are damaged by:
- Alcohol-based cleaners (including most "screen cleaning" sprays and nearly all household glass cleaners)
- Ammonia (common in window cleaners)
- Abrasive cloths or paper towels
- Circular scrubbing motions with any cloth
What works: a clean microfiber cloth, barely damp with water, wiped in straight passes. For fingerprints and smudges, this is typically enough. For heavier film, a dedicated screen cleaner labeled as safe for automotive touchscreens, applied to the cloth — not sprayed directly on the screen, which can let liquid run into the bezel and damage the electronics. Wipe gently, straight passes, minimal pressure.
The instrument cluster cover — the plastic or glass panel over the gauges — can be treated the same way as a screen. These panels are usually anti-glare coated and similarly vulnerable to alcohol and ammonia.
Soft-Touch Plastic and Rubber Surfaces
Soft-touch plastics — the rubberized, TPE-coated surfaces that feel slightly grippy and soft — have become common on higher-trim vehicles. They feel premium but are particularly vulnerable to certain cleaners.
Solvents and alcohol can degrade the soft-touch coating, causing it to feel sticky or develop a sheen it didn't originally have. Use the mildest cleaner option on these surfaces. A damp microfiber alone often handles light contamination. For heavier soiling, a gentle foaming interior cleaner applied lightly and wiped off thoroughly is the approach.
Sticky soft-touch plastics are often already compromised — the coating is degrading and has become tacky. This is accelerated by cleaning with alcohol, certain protectant products, and sometimes by direct UV exposure. Once the coating is in this state, cleaning helps but doesn't fully restore the feel. Replacingthe trim piece is the only real fix for severely degraded soft-touch plastic.
The Dash Top and Off-Gassing Film
The dash top — the flat, sun-facing surface at the base of the windshield — accumulates more off-gassing film and UV exposure than anywhere else in the interior. It also shows dust most visibly because it's in your direct line of sight.
Clean the dash top with your interior cleaner and the three-cloth system: apply to cloth, wipe, buff dry. Take particular care to get all residue off — any film left behind becomes a dust magnet within a day or two.
After cleaning, some people apply a very light UV protectant to the dash top to slow UV degradation of the plastic and provide a slight barrier to off-gassing re-deposition. If you do this, use a product that specifies matte finish — a glossy protectant on the dash top creates a distracting glare reflection in the windshield. And apply it sparingly. A thin coat that's been properly buffed into the surface is invisible and effective. A heavy coat looks greasy and is worse than leaving the surface bare.
Common Mistakes That Cause Streaking
Spraying directly on the dash: Overspray gets on screens, into gaps, and onto surfaces where you don't want it. Always spray on the cloth.
Using too much product: More cleaner doesn't mean cleaner dash. It means more residue to remove, more chance of streaking, and more soaking into crevices.
Not buffing dry: Wiping and walking away leaves the dissolved contamination to re-deposit as the moisture evaporates. Always finish with a dry buff.
Using the same cloth for everything: Contaminating your screen cloth with dash spray, or using a cloth that's picked up grit from elsewhere in the interior. Dedicated cloths for sensitive surfaces.
Using circular motions on gloss surfaces: Always straight passes on piano black and screens.
Applying protectant before cleaning: Protectant applied over contamination traps that contamination under the product and prevents it from being removed until you strip the protectant layer. Always clean first, protect last.