
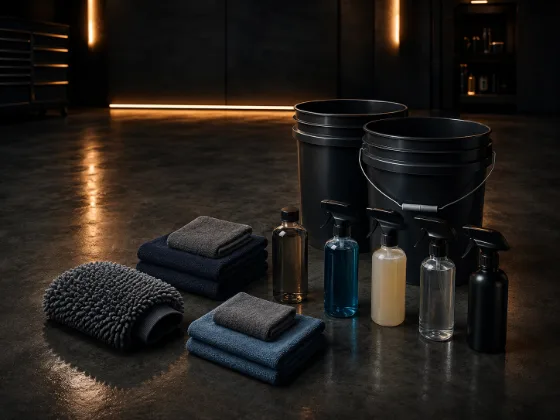
Walk into a detailing supply store or scroll through any detailing subreddit and you'll see shelves of products, endless debates about brands, and builds that cost more than most people's cars. This makes starting out feel expensive and complicated. It doesn't need to be either.
A first detailing kit should cover the basics well. It doesn't need to do everything. Here's what to buy, why, and what to hold off on until you've developed some technique and know what you actually need.
What You Actually Need First
Two wash buckets
Before any products: two buckets. The two-bucket wash method is the single most impactful change most beginners can make. One bucket is your wash water with shampoo. One bucket is your rinse water for cleaning your mitt between panel passes. Without two buckets, you're dragging dirt back onto your paint every time you reload your mitt — which is how you create the swirl marks that require a machine polisher to fix later.
Buckets are cheap. Get 3.5 to 5 gallon buckets, put a grit guard in each one (a plastic insert that sits at the bottom and traps contamination below the waterline), and use the two-bucket method every wash. This is more valuable than any product you can buy.
A quality wash mitt
Forget sponges. A wash mitt made from microfiber or lamb's wool is what you want. The pile — the depth of the fibers — traps dirt in the mitt and away from the paint surface. A sponge keeps dirt on the surface and drags it across the paint. Wash mitts cost $10–$20 and last for years if you wash them properly.
pH-neutral car shampoo
Car-specific shampoo that's pH-neutral. Not dish soap, not all-purpose cleaner, not household detergents. Dish soap strips wax and sealant, is unnecessarily harsh for regular washing, and leaves the paint unprotected. A pH-neutral car shampoo costs nearly the same, cleans effectively, and doesn't strip your protection layers between applications. This is a simple swap with no downside.
Microfiber drying towel
A large, plush microfiber drying towel (or two). These are typically 24"x36" or similar — big, thick, and designed to absorb water from the paint surface without dragging. Cheap thin towels scratch paint. A quality drying towel pulls water up into the pile without abrasion. You need at least one, ideally two so you can switch mid-car without spreading water around.
Wheel cleaner and wheel brush
Wheels are the dirtiest part of the car. A dedicated pH-neutral wheel cleaner and a soft wheel brush let you clean them without spreading brake dust onto your paint. Work wheels first before the paint — that way any contamination that flicks off the wheel doesn't land on a surface you've already cleaned.
A spray detailer or quick detailer
Quick detailer is a light lubricant-and-cleaner spray for removing light dust and fingerprints between washes, and for use as a drying aid to add lubrication during the drying step. A bottle of quick detailer is one of the most-used products in any kit because it covers a dozen small use cases — dust removal, detailing the interior trim, wiping down glass between washes. Get one.
A protection product
After every wash, the paint should have some kind of protection on it. For a beginner's kit, a spray wax or spray ceramic coating is the easiest entry point. These apply after washing and drying — spray on, spread with a clean microfiber, buff off. They add slickness, protection from UV and environmental contamination, and make the next wash easier. Spray wax is simpler to apply. Spray ceramic lasts longer and provides better water behavior. Either is correct for a beginner.
Glass cleaner and a clean microfiber for glass
Dedicated glass microfibers — the ones with a tighter, less-linting weave — and a glass cleaner that doesn't leave streaks. Keep your glass cloths separate from your paint cloths. Silicone and product residue from paint cloths transferred to glass causes smearing that's very hard to fix.
What to Skip for Now
A machine polisher
Dual-action polishers are excellent tools. They're also the entry point to a skill — paint correction — that takes time and practice to develop. If you buy a machine polisher before you've developed the knowledge to use it correctly, you risk burning through paint, creating holograms, or spending money on pads and compounds without getting useful results. Start with hand washing and protection. Learn the fundamentals. When you understand what paint correction is and why you need it, the polisher purchase will make sense.
Foam cannon
Foam cannons are popular on social media because they look dramatic. A thick layer of soap foam sitting on a car is visually satisfying. In practice, foam cannons do not remove more contamination than a two-bucket hand wash — they're a pre-wash step that softens loose contamination before contact washing. They require a pressure washer. They add a step to the process. For a beginner focused on learning to wash without scratching, the foam cannon adds complexity without adding proportionate value. Get the two-bucket method dialed in first.
Ceramic coating (professional or DIY kit)
Ceramic coatings — not spray ceramics, but actual liquid ceramic coatings that cure on the paint — are a more permanent protection solution. They're also significantly more difficult to apply correctly. Improper application creates high spots and streaks that are difficult to remove. If you apply ceramic coating to paint that isn't properly decontaminated or corrected first, you're sealing imperfections in. Learn decontamination and basic paint care first. Add ceramic when you understand what the surface needs to be in before you coat it.
Specialty brushes and detailing swabs
You'll see kits with twenty types of brushes for air vents, wheel wells, emblems, and trim gaps. This is gear acquisition syndrome territory. Two or three quality brushes cover 95% of use cases: a soft-bristle interior brush for vents and trim, a wheel brush, and maybe a large paint-safe boar-hair or soft-bristle brush for initial rinse-and-agitate on trim pieces. Don't buy ten to replace two.
Multiple lines of the same product type
You don't need three different car shampoos, two wheel cleaners, and four tire dressings. Product collecting is a common trap. Pick one of each product category, learn it, and develop a protocol around it before adding more options. The fastest way to learn is to use the same products consistently enough that you understand how they behave.
The Beginner Protocol
Wash — decontaminate (iron remover and/or clay bar when needed, not every wash) — protect — maintain between washes with quick detailer.
That's it. Every step of that protocol has nuance you'll learn as you go. But the framework is simple, and every product in your starter kit fits somewhere in it. Don't add products until you understand where they fit and what gap they fill.
Budget Guidance
A functional beginner kit — two buckets, grit guards, wash mitt, pH-neutral shampoo, microfiber drying towels, wheel cleaner, wheel brush, quick detailer, spray wax or spray ceramic, glass cleaner, and a set of microfibers — will run $100–$200 depending on the quality level you start at. There is no need to spend more to get started. The marginal improvement from premium products over quality mid-range products is much smaller than the improvement in technique over time. Spend on quality where it counts (the wash mitt and drying towels, which contact your paint directly) and don't over-invest in your first bottle of wheel cleaner.
The Real Investment
The biggest factor in your detailing results for the first year isn't what you buy — it's how carefully you apply it. A beginner who uses a $20 wash mitt carefully and patiently with a proper two-bucket technique will have fewer scratches than someone rushing through the wash with a $60 premium mitt. Products matter, but technique matters more. Every product in your first kit is teaching you something about how to work on paint. Slow down, learn, and the better products and tools can come later when you know what you're buying.