
Decontamination gets treated as a single step in a lot of detailing guides. "Decontaminate the paint" gets listed between "wash" and "polish" like it's a simple checkbox.
It's not. Done properly, decontamination is a sequence of three distinct steps, each targeting a different type of contamination, and the order matters. Do them in the wrong sequence and you either reduce the effectiveness of each step or create extra work for yourself.
Here's the full sequence, why it's in this order, and what's happening at each stage.
What You're Dealing With
There are three categories of contamination that decontamination targets:
Ferrous (iron) contamination: Iron particles from brake dust, rail dust, and industrial fallout that have embedded in or bonded to the clear coat. These react with specific chemistry and turn into water-soluble compounds that rinse off.
Physical surface contamination: Everything else that's bonded to the paint surface — industrial fallout (non-iron), overspray, road film, environmental particles — that creates the rough, sandpaper texture when you run your finger across the paint.
Hydrocarbon/tar contamination: Road tar, bitumen, adhesive residue. These are petroleum-based compounds that bond aggressively to paint and require a solvent-based product rather than water-based chemistry.
Each of these requires a different tool. That's why it's a sequence, not a single product.
Step 1: Wash the Car
Before any decontamination product goes on the car, the car needs to be washed. Thoroughly — not a quick rinse, but a proper wash with shampoo.
The reason: decontamination products work by contacting contamination. If there's a layer of loose road grime, dust, and surface soiling between the product and the contamination it's targeting, the product spends its chemistry on the surface layer instead of penetrating to the embedded particles underneath.
A clean surface lets iron remover get to the iron. It lets clay contact the bonded contamination. A dirty surface just means less effective chemistry and more work.
Wash, rinse until water runs clear, and dry. Then start the decontamination sequence.
Step 2: Iron Remover
Iron remover goes first for a specific reason: it dissolves the iron particles chemically, which means the clay bar in the next step has less work to do.
Iron particles are partially embedded in the clear coat surface. The clay bar can mechanically dislodge some of them, but it's not ideal — you'd need more passes, more pressure, and more abrasion to pull stubborn iron particles out. If the iron remover dissolves them first, they simply rinse away, and the clay bar focuses on the non-iron contamination it handles best.
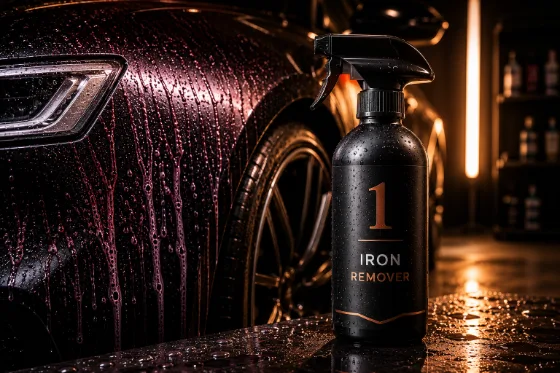
Application: spray the iron remover generously onto the paint surface. Work panel by panel or do the whole car at once, depending on the product's dwell time. You'll see the product begin to turn purple-red where it contacts iron contamination — this is the reaction happening in real time. More purple = more contamination.
Let it dwell for the time specified on the product (typically 3–5 minutes). Don't let it dry — if it starts to dry, mist with water. Rinse thoroughly with strong water pressure to flush the iron compounds completely off the paint.
Repeat if the contamination was severe (very heavy purple reaction). A second pass often catches what the first didn't fully dissolve.
Step 3: Clay Bar
Now the physical contamination step. The iron has been addressed chemically; the clay handles everything that's left bonded to the surface — industrial fallout, overspray, road film, mineral deposits, and any iron particles the remover didn't fully dissolve.
Clay bar with lubricant, working in straight lines with light pressure, panel by panel. The contamination transfers from the paint into the clay; you can see and feel it happening as the clay discolors and as the panel becomes progressively smoother under your hands.
Key details:
- Keep the surface well-lubricated the entire time — re-spray constantly
- Fold the clay regularly to expose a clean face
- If the clay is dropped, discard it — floor contamination can scratch your paint
- Test with the plastic bag test after each panel — smooth means done, rough means another pass
After completing the clay step, wipe down each panel with a clean microfiber and inspect the surface. It should feel fundamentally different from the beginning of the process — smooth, almost glass-like rather than gritty.
Step 4: Tar Remover
Tar remover is a targeted step, not necessarily whole-car. Road tar, bitumen, and adhesive residue are hydrocarbon-based — they don't respond to water-based chemistry and they won't be picked up by clay bar (the clay can't adhere to oily, petroleum-based substances).
The characteristic signs of tar contamination: small black or brown dots, typically on lower panels and rear bumpers, that can't be removed with washing. Under close inspection they often have a slightly raised, almost three-dimensional appearance — the tar has pooled on the surface before hardening.
Apply tar remover with a clean microfiber or directly spray it onto the affected areas. Let it dwell (usually 30 seconds to 2 minutes) to let the solvent dissolve the tar, then wipe gently. Don't scrub — the solvent should do the work. If the spot is stubborn, apply more product, let it dwell longer, then try again.
Rinse or wipe the area clean after removing the tar.
Why tar remover comes after clay: the clay process can sometimes break the surface of tar spots, making them easier to treat. Also, if you use a solvent-based tar remover first and it leaves any residue, that residue can interfere with the clay's ability to grip the surface properly.
Step 5: Final Rinse and Dry
After all three contamination steps, give the car a final thorough rinse to remove all product residue. Check all the gaps, seams, and trim areas — iron remover and clay lubricant can accumulate in recesses.
Dry with a clean, plush microfiber or a car dryer. The car is now at maximum cleanliness and ready for the next step in the process.
What Comes After
A freshly decontaminated car is in its ideal state for whatever comes next:
- Polishing: If the paint has swirls, scratches, or oxidation you want to address, polish now. The paint surface is clean and free of contamination that would otherwise interfere with the polishing compounds.
- Protection: If the paint is in good shape, go straight to applying your wax, sealant, or coating. The clean surface allows the protection to bond directly to the clear coat rather than to a contamination layer — which means better adhesion and longer durability.
Don't let the car sit for days between decontamination and protection. Environmental fallout starts accumulating immediately. Complete the sequence in a single session when possible.
How Often?
The full decon sequence makes sense:
- Before applying any coating, sealant, or wax
- At the start of any paint correction session
- Once or twice a year for a maintained daily driver
- More frequently for cars in high-contamination environments (near rail lines, heavy traffic, industrial areas)
Between full decontamination cycles, maintenance washing handles surface dirt. The full sequence resets the paint when it needs it — not as a routine step on every wash day.
The Logic of the Sequence
Wash → Iron Remover → Clay → Tar → Protect. Each step cleans for the next. Washing makes iron remover more effective. Iron remover makes clay more effective. Clay makes tar remover more precise. And all of it together makes protection last longer.
Skip steps or do them out of order and you're either doing more work than necessary or leaving contamination in the paint that undermines everything that comes after. Do it in sequence and the results are immediately, tangibly better.