
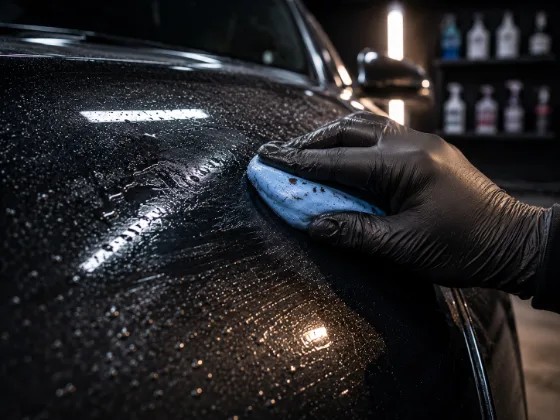
Clay bar sits in a weird middle zone where most car owners have vaguely heard of it but very few actually know what it does. Which is a shame, because it's one of the most effective and satisfying tools in detailing — and it fixes a problem that literally no other method can solve.
This is everything you need to know to use it correctly.
What Clay Bar Actually Is
Detailing clay is a malleable, resin-based compound that's mildly abrasive at the surface level. It was originally developed in Japan in the 1990s and quickly became standard in professional detailing worldwide because it solved a previously difficult problem: removing bonded surface contamination without any chemical solvents or mechanical polishing.
The clay works on a simple principle: it's tackier and more adherent than the contamination particles bonded to your paint surface. When the clay is pressed against the paint and dragged across a lubricated surface, the contamination particles stick to the clay matrix and are physically sheared free from the paint. They transfer from the paint into the clay, leaving the paint surface clean.
This is purely mechanical — no chemistry is dissolving anything. The clay is literally picking contaminants up off the paint.
What It Removes
Clay bar removes physically bonded surface contamination:
- Industrial fallout and air pollution particles
- Overspray (paint, clear coat, road marking paint)
- Tree sap residue (after it's been broken down)
- Water spot mineral deposits (mild ones)
- General road film and bonded road grime
- The rough, sandpaper texture that makes paint feel gritty
What it doesn't remove: scratches, swirl marks, oxidation, or paint defects that are in or below the clear coat surface. Clay bar is a surface-level tool. It cleans the surface; it doesn't repair it.
Also worth noting: clay bar removes physical contamination but isn't particularly effective on iron particles, which are chemically bonded rather than physically adhered. Iron remover should be used before claying to address those.
Clay Bar Grades
Clay bars come in different grades of aggressiveness:
Fine/mild grade: The most common for general use. Safe on all paint types including single-stage paint and soft finishes. Requires more passes on heavy contamination but leaves the surface cleaner and needs less follow-up polishing.
Medium grade: Faster at removing heavier contamination but leaves more micro-marring in the paint surface. Fine for cars that will be polished afterward. Not ideal if you're going straight to protection without polishing.
Heavy/aggressive grade: For severe contamination like heavy overspray. Always requires polishing afterward to remove the surface marring it leaves behind. Not for general use.
For most detailers most of the time, fine grade clay is the right choice. It's effective on typical contamination and doesn't require polishing to clean up after it.
Lubricant: The Most Important Variable
Clay bar lubrication is not optional. Without lubricant, the clay drags directly against the paint surface, and at that point the clay is just abrasive compound. You'll mar the paint and damage the clear coat.
The lubricant creates a film between the clay and the paint that lets the clay glide freely while still making contact with and picking up contamination. The clay can "feel" through the lubricant layer — the contamination transfers through it — but the clay itself isn't dragging against the paint.
What works as lubricant:
- Purpose-formulated clay lubricant — the best option; specifically engineered for this application
- Quick detailer spray — commonly used, works well
- Diluted car shampoo — works in a pinch but less slick than dedicated lubricant
Don't use water alone (not enough slip), don't use wash soap straight from the bottle (too thick), and don't use household products — the wrong lubricant can degrade the clay or leave residue on the paint.
Step-by-Step: How to Clay a Car
Before you start: Wash and rinse the car completely. You're not trying to wash contamination off with the clay — you want to remove loose surface dirt first so the clay is only dealing with bonded particles.
Prepare the clay: Take a piece of clay (if using a traditional bar, cut off about a third and put the rest away). Knead it into a flat oval shape — roughly palm-sized and about half an inch thick. This flat shape is what you press against the panel.
Work one panel at a time: Don't try to clay the whole car in one go without stopping. Work panel by panel. Spray lubricant generously over the section before you start, and keep re-spraying as you work.
Light pressure, straight passes: Press the clay flat against the panel with light, even pressure — just enough to maintain contact. Work in straight lines, overlapping slightly. You'll feel initial resistance as the clay catches contamination. As the section gets cleaner, the clay glides more freely. That transition in feel is your real-time feedback that it's working.
Fold the clay when it gets loaded: You'll see and feel the contamination the clay picks up — it discolors the clay surface. When a section of clay gets noticeably dirty, fold it over to expose a clean face. Keep folding as you work. Never clay with a surface that's already full of contamination — you're just pushing grime around.
Wipe the panel after each section: Use a clean microfiber to wipe off the lubricant residue after completing each panel or section. Check the paint with your fingertips — it should feel noticeably smoother. If it still has texture, do another pass.
Test with the plastic bag: The definitive test. Put your hand in a plastic bag and drag it across the section. Glass-smooth means done. Any remaining texture means more passes.
When to Replace the Clay
Clay has a finite lifespan based on how much contamination it picks up, not how much paint surface it covers.
Replace or discard your clay when:
- It's been dropped. This is non-negotiable. Any contamination the clay picked up from the floor can now scratch your paint. Never use dropped clay again.
- It's fully saturated with contamination. If you've kneaded it repeatedly and can't expose any more clean clay surface, it's done.
- It's changed consistency. Fresh clay is soft and pliable. Old, expired clay gets brittle and crumbly. Crumbly clay can leave fragments on the paint that need to be removed and can cause scratching.
- It's been more than 12–18 months. Clay degrades over time even if stored properly. Don't use clay that's been sitting in a drawer for two years.
Storage tip: Keep clay in the liquid it was packaged with, or wrap it in plastic wrap to prevent it drying out. Keep it away from heat.
Clay Mitts and Clay Discs: Modern Alternatives
Traditional clay bars are being increasingly replaced or supplemented by clay mitts and clay discs, which use a clay-coated surface bonded to a mitt or backing plate rather than a loose piece of clay.
Advantages of clay mitts:
- No drop risk — the clay is attached, so if you fumble it, you don't lose it
- Cover more area faster
- Can be rinsed and reused many times
- Work with a drill or DA polisher when using a backing pad version
Disadvantages:
- Can't fold to expose a clean surface — you need to rinse the mitt frequently
- Slightly more aggressive than fine-grade bar clay (though manufacturers vary)
- Shorter total lifespan before the clay surface wears out
Both work. Clay mitts are often the better practical choice for doing full cars; traditional clay bars give more control for spot work and detailed areas.
After Claying
Freshly clayed paint is at peak receptivity for whatever protection you're applying. The surface is stripped of contamination, and bonding agents in waxes, sealants, and coatings can adhere directly to the clean clear coat.
Don't wait. Apply your protection the same day you clay, ideally within a few hours, before the car has time to pick up environmental contamination again.
If you polished before claying — or plan to polish after — clay first, then polish, then protect. Polishing over contaminated paint grinds those particles into the surface. Clay first, always.