
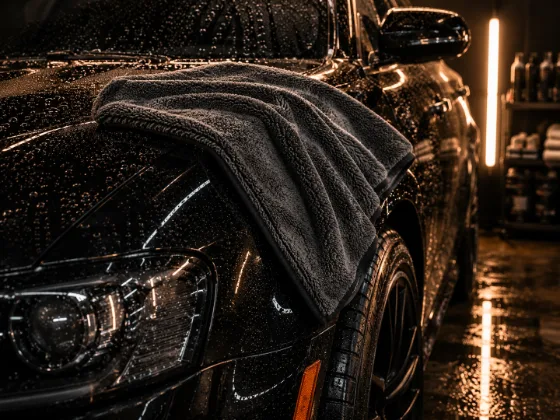
Most people assume that if they wash carefully, the drying is just cleanup. It isn't. The drying step is one of the most common places swirl marks and fine scratches get added to paint — often erasing the care you took during the wash.
The good news: drying correctly takes about the same amount of time as drying incorrectly. It's a technique problem, not a time problem.
Why Drying Scratches Paint
The mechanism is the same as washing: any particle of grit or contamination between your towel and the paint gets dragged across the clear coat under pressure. Unlike during washing, where there's water lubrication, drying a car involves towels making direct, firm contact with the surface.
The three main causes of drying-induced scratches:
1. A contaminated towel. A towel that's been used previously and still has grit embedded in the fibers will scratch paint regardless of how gently you use it. Drying towels need to be washed separately and kept scrupulously clean.
2. Residual contamination on the paint. If the wash didn't completely remove grit from the surface, toweling that grit across the panel during drying is the same as skipping the rinse. A thorough final rinse before drying is essential.
3. Circular drying motions. Dragging grit in a circle multiplies the scratch pattern in every direction, creating the classic swirl mark. Straight-line, parallel motions limit any scratch to one direction, where it's far less visible.
Choosing the Right Drying Towel
Not all microfiber towels are created equal for drying. You want a large, plush, high-GSM (grams per square meter) microfiber — typically 600–1200 GSM for drying work. The thick pile lifts water off the surface rather than pushing it around, and the softness reduces the friction between towel and paint.
Options:
Waffle-weave microfiber: The waffle texture creates a larger surface area and channels water away from the contact face. Very absorbent and very good at drying without heavy pressure. This is the most popular choice for paint-safe drying.
Plush microfiber (large format): A large, very plush microfiber that lays flat on the panel and absorbs water through weight alone. These work well but require clean folding technique — you want to use a clean face for each panel.
Traditional chamois: The classic choice. A chamois will dry a car effectively when used correctly, but it's less forgiving than microfiber — if it dries out between uses, it can feel rough. Needs to be kept moist in storage and pre-wetted before use.
What to avoid: terry cloth towels (the loops trap grit against the paint surface), bath towels (wrong weave for automotive use), and any towel that's been washed with fabric softener (it fills the fibers with coating that reduces absorbency).
The Drying Sequence
Start with a blower. Before you touch the car with a towel at all, remove as much water as possible with an air source — a leaf blower, a car dryer, even a shop vac on blow mode. The water you blow off is water that doesn't require towel contact. This is particularly important for door gaps, side mirrors, around the fuel door, and any trim gaps where water pools and then drips out onto panels you've already dried.
Skipping this step is why water drops appear on your panel right after you dry it — they drip from a door gap or trim channel onto the paint below. A blower eliminates most of this.
Work top to bottom. Water runs down. Dry the roof first, then the hood and trunk, then the upper doors, then the lower panels. Drying bottom-up means water from undried areas above drips onto panels you've already done.
Fold the towel into quarters. A folded towel gives you eight usable faces (four on each side). When one face picks up contamination or gets saturated, fold to a fresh face. Never use the same face on multiple panels if the towel is visibly contaminated — fold to clean.
Lay the towel flat, don't drag it. Place the towel flat on the panel and draw it toward you in a straight line. Minimum downward pressure — you're moving water, not scrubbing. The towel's absorption does the work; your pressure just moves it along.
One straight wipe, then lift. Lift the towel between panels rather than sliding it continuously. Lifting and repositioning keeps the contact face clean and prevents dragging contamination from one panel to the next.
Adding Lubrication During Drying
This is a technique improvement that makes a real difference: apply a spray product to the wet panel before you touch it with the drying towel.
A spray detailer or spray wax, lightly misted onto the wet panel, adds a lubricating film between the towel and the paint. This reduces friction during the wipe, which reduces the cutting action of any grit that might be present. It also reduces the chance of towel marks — the faint lines that sometimes appear when a very clean panel is dried without any lubricant.
The double benefit: if you use a spray wax for this purpose, you're simultaneously applying a layer of protection as you dry. One product, two outcomes, minimal extra time.
Straight Lines Only
This can't be overstated. Circular drying motions create swirl marks. Straight lines create linear scratches that are far less visible under light. If your muscle memory from years of wiping windows tends toward circles, consciously override it every time you dry paint.
The direction of the straight lines matters less than the fact that they are straight. Left-to-right, front-to-back, whatever your natural motion produces — just no circles.
Managing Panel Drying Time
Water sitting on paint, especially in direct sun, evaporates and leaves behind the mineral deposits it carried — which create water spots. Water spots can range from light (washes off with a detail spray) to severe (etched into the clear coat and requiring polishing to remove).
In direct sun or high heat, prioritize speed. Dry one panel completely before moving to the next. Don't let panels sit wet while you work on other parts of the car.
In shade, you have more time. But "in shade" should be your default position for washing and drying anyway — no product works correctly on a hot panel in direct sun.
What to Do About Door Gaps and Trim
Door gaps, mirror brackets, door handles, antenna bases, trim panel edges — all of these hold water that drips out after you think you're done. The fix:
- Blow them out with a blower before you start toweling
- Open each door and dry the jamb separately before closing
- After you think you're done, open and close each door once to release any remaining trapped water, then do a final spot wipe
It's a minor annoyance the first few times. It becomes automatic quickly.
The Takeaway
Drying a car without leaving scratches comes down to three things: a clean, appropriate towel; straight-line motions; and removing standing water from gaps and seams before you towel anything. Add lubrication to the drying step with a spray product, and you've essentially eliminated drying as a source of new paint damage.
It takes the same amount of time as drying badly. It just requires paying attention to what you're doing.