
If you asked most people to describe how they wash their car, the sequence would go something like: rinse, soap up, scrub, rinse, dry. Maybe with a bucket and a mitt if they're being careful.
That's missing a step. A critical one. The pre-wash.
The pre-wash happens after the initial rinse and before the contact wash — before you ever touch the paint with a mitt. It's the step that most beginners skip because they don't know it exists, and most car wash guides don't mention it.
Once you understand why it exists, you'll never go back to washing without it.
The Problem It Solves
When you rinse a car with water, a lot of loose contamination washes away. But not all of it. Road film — the thin, invisible-to-the-eye layer of hydrocarbon contamination that comes from exhaust, fuel vapor, and road surface off-gassing — bonds to paint and doesn't rinse off with water alone. Neither does the light layer of road dust that has been slowly baked into the surface since the last wash.
When you bring your wash mitt to a car that still has this contamination on it and start moving the mitt, you're dragging that contamination across the paint. The mitt picks up grit, and the grit goes across the clear coat. Swirl marks happen.
The pre-wash is a chemical solution applied to the paint before the mitt ever touches it. Its job is to break the bond between the contamination and the paint so that contamination rinses away before the contact wash begins. Less contamination on the surface when the mitt arrives means less grit available to scratch.
How It Works
Pre-wash products are typically alkaline solutions — degreasers, all-purpose cleaners, or dedicated pre-wash formulas. The alkalinity helps break down the hydrocarbon-based road film, traffic grime, and light grease that water can't move.
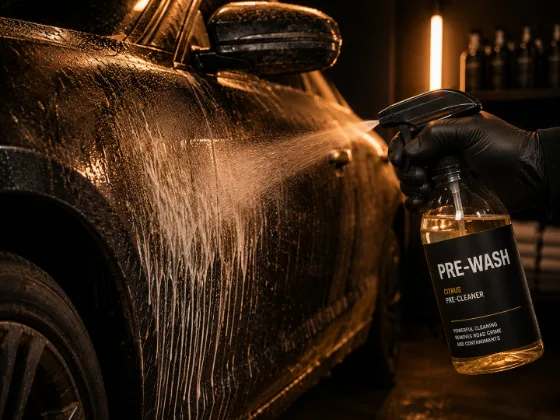
You spray the pre-wash solution across the wet car after the initial rinse. Key: the car should be wet, not dry. Spraying chemical pre-wash on a dry car concentrates it and can cause streaking or, with stronger formulas, affect sealants and coatings.
Dwell time is typically 60–90 seconds. You're watching the product do its work — on a particularly dirty car you may see it visibly emulsifying contamination. Don't let it dry on the paint, especially in hot conditions.
Then rinse thoroughly. Watch what comes off. On a car that hasn't been properly pre-washed in a while, the rinse water will be noticeably more colored than it looked before the pre-wash went on. That's contamination that's no longer going to be on the paint when your mitt arrives.
Pre-Wash vs. Your Regular Shampoo
Your car shampoo is designed for the contact wash step — it produces lubrication for your mitt, it's pH-balanced to be safe on wax and coatings, and it's gentle enough for direct contact with the paint.
A pre-wash product is a different formulation. It's more aggressive in its chemistry, designed to break bonds rather than lubricate, and it works without any physical agitation. This is why it's a separate step — you're not just applying soap early. You're doing chemistry that your shampoo isn't designed to do.
Some people use a diluted all-purpose cleaner (APC) as their pre-wash rather than a dedicated pre-wash formula. This works well and is more economical — a good APC dilutes differently for different jobs, and at a 1:10 to 1:20 dilution it makes an effective pre-wash without being aggressive enough to harm wax or coatings.
You Don't Need a Foam Cannon
A lot of beginners associate the pre-wash step with a foam cannon because that's how they see it done on YouTube. A foam cannon does make the application faster and more even, but it's not required.
A spray bottle loaded with diluted pre-wash does the job entirely well. You're less likely to get as thick a coverage, but coverage isn't the point — dwell time is. Spray it on, let the chemistry work for a minute, rinse it off. The mechanism is the same whether you applied it with a foam cannon or a trigger sprayer.
What a Pre-Wash Doesn't Do
A pre-wash removes surface contamination that's weakly bonded to the paint. It doesn't remove:
- Bonded contamination — iron particles embedded in the clear coat, road tar, tree sap. These require iron remover and clay bar decontamination, which are separate steps done periodically rather than every wash.
- Bug splatter — dried bug residue, particularly on the front bumper and hood, often requires its own targeted product. Some pre-washes are effective against fresh bugs; for older, dried-on splatter you may need a dedicated bug remover.
- Brake dust — heavily contaminated wheels need a dedicated wheel cleaner that can handle the iron content. Pre-wash on wheels helps, but wheels should get their own treatment first.
The pre-wash does the light lifting. The contact wash does the detail work. They work together — neither replaces the other.
How Often Should You Pre-Wash?
Every single wash. Not occasionally. Not when the car is "really dirty." Every wash.
Here's the reasoning: you can't see most of the contamination that a pre-wash removes. Road film is invisible until it's on your mitt. The car might look like it's just dusty — and it is — but under that dust is a layer of bonded road grime that your first rinse didn't remove.
Skipping the pre-wash because the car "doesn't look that dirty" is exactly when you're most likely to do damage — because the visible dirt makes you feel like there's nothing to remove, while the invisible contamination is still there waiting for your mitt.
The Time Investment
Spray the car with pre-wash solution, wait 90 seconds, rinse thoroughly. It adds maybe three to four minutes to your wash. The benefit — dramatically reduced grit on the paint when you start the contact wash — is entirely disproportionate to the time cost.
It's the highest-value addition most beginners can make to their wash process, and it costs next to nothing to start.
Where This Fits in the Full Process
The sequence is: wheels first → rinse the car → pre-wash (spray, dwell, rinse) → contact wash (two-bucket method) → final rinse → dry. The pre-wash sits between the initial rinse and the contact wash, giving the chemistry time to work before the physical cleaning begins.
Every other step in that sequence is made more effective by the pre-wash before it. Your wash water stays cleaner. Your mitt picks up less grit. Your rinse removes less residual contamination. The entire wash is safer and more effective because the contamination load was reduced before the mitt arrived.
Skip it once and nothing obviously bad happens. Skip it consistently over a year and the swirl marks accumulating in your clear coat tell the story.