
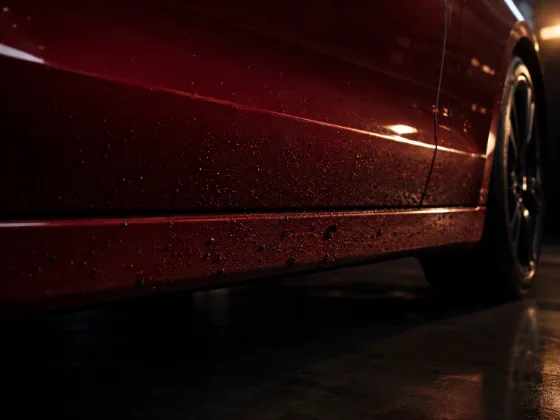
The small black dots on your lower bumper and door sills. The dark streaks running along the rocker panels. The scattered spots on the rear quarter panels that get worse the longer you ignore them.
That's road tar. It's a mix of bitumen, asphalt binders, and petroleum compounds that gets flung off road surfaces by your tires and the tires of other vehicles. It travels in liquid or semi-liquid form, lands on paint, and then hardens — bonding to the clear coat in a way that makes it extremely resistant to conventional washing.
If you've tried scrubbing tar spots off with shampoo and a wash mitt, you already know: it doesn't work. The tar just smears, and if you scrub hard enough you start marring the paint. There's a right way to remove it that's both more effective and safer for the finish.
Why Standard Washing Fails
Car shampoo is water-based. Road tar is petroleum-based. These chemistries are fundamentally incompatible — water-based cleaners can't dissolve or emulsify hydrocarbon compounds. The shampoo essentially doesn't "see" the tar; it washes everything else around the tar spot but leaves it untouched.
Mechanical scrubbing without chemistry to break the bond just spreads the tar rather than removing it. You end up with a larger smear or a thinner film across a bigger area — and you've dragged something abrasive across the clear coat in the process.
The fix requires a solvent-based product. Solvents dissolve the hydrocarbon bonds that make tar stick, converting the solid or semi-solid tar into a liquid that can be wiped away.
What Tar Remover Actually Does
Dedicated tar remover products contain solvents — typically a combination of petroleum distillates, terpenes, or citrus-derived solvents — that dissolve bitumen and other hydrocarbon-based contaminants on paint.
When you apply tar remover to a spot and let it dwell, the solvent penetrates the tar, breaks the molecular bonds holding it together, and liquefies the hardened material. At that point, a gentle wipe with a clean microfiber removes the dissolved tar without any of the scrubbing force that would be needed otherwise.
Quality tar removers are formulated to work on paint without degrading the clear coat or affecting wax and sealant protection significantly. They're not paint-safe in unlimited quantities — don't soak a section and let it sit for an hour — but with normal use and a rinse afterward, they're safe on all types of automotive paint.
The Removal Process
Step 1 — Wash first. Remove surface dirt before treating tar. You want the tar remover to contact the tar directly, not work through a layer of road grime.
Step 2 — Identify the affected areas. Check lower panels and rear sections most carefully. Tar tends to concentrate near the bottom of doors, lower bumpers, rocker panels, and the rear of the car (thrown backward from front tires).
Step 3 — Apply tar remover directly to the spots. Either spray it directly onto the tar spot, or apply it to a clean microfiber and press it against the spot. You're trying to saturate the tar, not flood the surrounding paint.
Step 4 — Let it dwell. This is the step most people rush. The solvent needs time to work. Depending on how hardened and thick the tar is, it may need anywhere from 30 seconds to 2–3 minutes of dwell time. You'll often see the edges of the spot soften and start to run slightly — that's the solvent doing its job.
Step 5 — Wipe gently with a clean microfiber. Fold a clean microfiber to a fresh face and use a gentle blotting or light wiping motion. Avoid scrubbing. If the tar hasn't fully dissolved, apply more product and let it dwell longer rather than scrubbing harder.
Step 6 — Inspect and repeat if necessary. Heavy tar buildup may require multiple applications. Between applications, rinse the area to see clearly what's left. Multiple gentle treatments beat one aggressive scrub every time.
Step 7 — Final wash and rinse. After removing all visible tar, wash the affected panels again to remove the solvent residue. Most tar removers will strip any wax or sealant from the treated areas, so those areas will need protection reapplied.
Tools That Help
Microfiber towels: Use dedicated microfibers for tar removal — tar will discolor them and the residue can contaminate microfibers you use for other tasks. Fold to a fresh face for each spot.
Cotton swabs or detailing swabs: Excellent for very small, isolated tar spots. Soak the swab with tar remover and work the spot without touching surrounding paint unnecessarily.
Soft-bristle detail brush: On texture or panel gaps where tar has accumulated, a detail brush dipped in tar remover can get into areas a flat microfiber can't reach.
What About WD-40?
Yes, WD-40 works on road tar. It's a petroleum-based lubricant and the hydrocarbon chemistry does dissolve tar. A lot of detailers use it as a tar-spot treatment in a pinch.
The issue is residue. WD-40 leaves an oily film that requires thorough degreasing to remove, and if it's not fully cleaned up it will interfere with any protection you apply afterward. A dedicated tar remover is cleaner and safer — it's formulated specifically for automotive paint and rinses cleanly.
Use WD-40 if it's what you have on hand. Just degrease thoroughly afterward.
Prevention: Can You Stop Tar from Sticking?
Yes, to a significant degree. Paint protection — wax, sealant, or ceramic coating — creates a barrier between tar and the actual clear coat. Tar that lands on a protected surface is bonded to the protection layer rather than directly to the paint.
In practice this means: tar on a properly protected car is much easier to remove. The solvent can break the tar-to-protection bond without needing to work as hard as it would to break a tar-to-clear-coat bond. Regular tar spot removal at every wash becomes a 30-second job rather than a multi-step process.
Wax is the easiest protection to apply and provides meaningful tar resistance. Sealants and ceramic coatings provide better and more durable protection. Even a basic layer of wax makes a noticeable difference in how easily tar removes.
When to Decontaminate vs. Spot-Treat
For isolated tar spots — a few dots here and there — spot treatment at each wash is the right approach. Quick application, quick removal, done.
When you have heavy, widespread tar accumulation — lower panels coated with spots, tar visible across multiple panels — it makes more sense to include tar removal as part of a full decontamination cycle: iron remover first, clay bar for physical contamination, then tar remover as a targeted step. The clay bar can sometimes break the surface of tar spots and make them more receptive to the solvent step that follows.
The rule of thumb: spot-treat what's manageable, do a full decon when the scale of contamination warrants it.
After Tar Removal
Tar remover strips protection from the treated areas. Always reapply wax or sealant to any area you treated with tar remover — especially if you're spot-treating rather than doing a full decon. A quick wipe of spray wax over the affected panels after washing restores the barrier and makes the next round of tar easier to deal with.
The cycle is: remove → protect → repeat. The protection step isn't optional if you want future tar removal to stay manageable.