
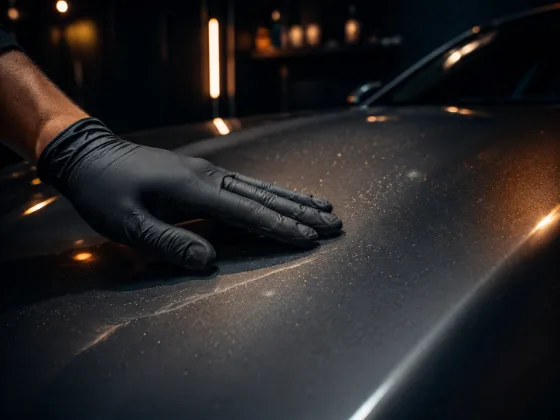
Run your fingertips across your paint after a fresh wash. If it feels perfectly smooth — silky, almost glassy — you're good. If it feels like fine sandpaper, or if you can feel subtle bumps and texture under your hand, your paint is contaminated.
This is one of the most common problems in detailing and one of the most frequently misunderstood. Most people assume rough paint means damaged paint. It doesn't. It means contaminated paint. And there's a meaningful difference, because contamination can be fully removed without any abrasive polishing.
What's Actually On the Paint
The rough texture you're feeling is physically bonded contamination — particles of road grime, industrial fallout, brake dust, environmental pollution, and overspray that have embedded themselves in or adhered to the clear coat surface.
These particles aren't sitting on top of the paint waiting to be washed off. They're mechanically bonded — stuck in the microscopic pores and texture of the clear coat, or fused to the surface through heat, pressure, or chemical action over time.
Common sources:
- Industrial fallout: Tiny metallic and chemical particles from manufacturing, construction, and air pollution. If you park outside in a city or near an industrial area, these accumulate constantly and invisibly.
- Rail dust: Fine ferrous particles generated by train brakes grinding on rails. Extremely common in areas near rail lines — these particles travel surprisingly far on the wind and embed deeply into paint.
- Brake dust: Metallic particles shed by your own rotors and pads. Hot when they leave the rotor, they embed into paint surfaces they contact.
- Overspray: Airborne particles from nearby painting or construction work. If someone near you painted a fence, a building, or a road surface while your car was parked outside, the mist settles on your paint and bonds there.
- Road film: The complex mixture of asphalt residue, tire rubber, diesel soot, and road surface particles that coats every road-facing surface on your car.
What all of these have in common is that they don't respond to shampoo. No matter how carefully you wash, they stay put. You can't agitate them away. You need to mechanically or chemically dislodge them.
The Diagnosis: The Plastic Bag Test
Before doing anything else, confirm what you're dealing with. The plastic bag test is the standard way to check for surface contamination:
Take a clean plastic bag — a sandwich bag works perfectly — and put your hand inside it. Press your palm lightly against a section of paint you've just washed and dried, then slowly drag your hand across it.
The plastic amplifies the texture of the paint surface by removing the sensation from your fingertips. You feel exactly what's there. Clean paint feels like glass. Contaminated paint feels like fine sandpaper, or you'll hear a faint dragging sound as the bag moves across the particles.
Test multiple panels. The rear of the car near the wheels is typically the worst because of brake dust. The hood and roof accumulate industrial fallout. The lower panels accumulate road tar and road film.
The Fix: Clay Bar Treatment
Clay bar — or its modern equivalent, a clay mitt or clay disc — is the only tool that fixes this problem.
Clay bar is a malleable, mildly abrasive compound that's been used in professional detailing for decades. When lubricated with a spray lubricant and glided across the paint surface, it shears off the bonded contamination at the surface level without removing any paint.
Think of it this way: the clay is stickier than the contamination is adherent. As it passes over the surface, the particles stick to the clay and are pulled free. The clay traps them in its matrix instead of putting them back on the paint. After claying a badly contaminated car, you can see and feel the particles embedded in the clay — that's everything that was on your paint.
How Clay Bar Works: Step by Step
Step 1 — Start with a clean car. Wash thoroughly and rinse before claying. You want to remove loose surface dirt first so the clay is working on bonded contamination, not just moving grime around.
Step 2 — Work in small sections. One panel at a time, or even one section of a panel. Clay bar requires lubrication the entire time — if you work too large an area, the lubricant dries before you're done and the clay can drag.
Step 3 — Apply lubricant generously. Saturate the section. The clay needs to glide freely. Running it on a dry or under-lubricated surface creates friction and can leave marring — light surface scratches from the clay itself.
Step 4 — Work the clay across the surface. Flat, straight passes. Light pressure. Let the clay do the work. You'll feel resistance initially as it catches contamination. As the section gets cleaner, the clay glides more freely — that's your indicator that the contamination has been removed.
Step 5 — Fold the clay regularly. Fold it over to expose a clean face when the surface you're using gets loaded with contamination. Never continue claying with a surface that's black with grime — that contamination will be dragged back across the paint.
Step 6 — Wipe the section dry. After each section, wipe off the lubricant residue with a clean microfiber towel.
Step 7 — Do the bag test again. On the section you just clayed. It should feel smooth and glass-like. If there's still texture, do another pass.
Clay Mitt vs. Clay Bar: Which One?
Traditional clay bar is still excellent but takes practice — if you drop it, you have to throw it away (any contamination it picked up off the floor could scratch your paint). A clay mitt or clay disc eliminates the drop risk because it's attached to your hand or a backing plate.
Clay mitts also cover more area faster than a small bar. For most detailers doing full-car clay treatments, a mitt is the more practical choice. For tight areas or spot treatments, a bar gives you more control.
Both work on the same principle and produce the same result.
After Claying: What Comes Next
Claying removes the physical contamination from the surface. But you should also address iron and chemical contamination before claying, ideally — iron remover reacts with and releases the iron particles that claying would otherwise have to physically remove.
The full sequence: wash → iron remover → rinse → clay bar → wipe dry → protection (wax, sealant, or coating).
After claying, the surface is stripped of contamination and in its most receptive state for whatever protection you apply next. The protection bonds directly to the clean paint instead of to a layer of contamination.
Will It Stay Smooth?
No — contamination rebuilds over time. That's the nature of driving. A car that lives outside will need to be clayed every 6–12 months depending on environment. But with a layer of wax or sealant on top, the contamination bonds to the protection layer rather than directly to the paint, which makes it easier to remove at the next decontamination cycle.
The goal isn't to keep it perfect. It's to reset the surface before each protection application so the protection goes on a clean substrate and lasts as long as possible.
The Short Version
Paint that feels rough has contamination embedded in the clear coat surface. Washing doesn't fix it. Clay bar does. The process takes about an hour for a full car, requires lubricant and a clay bar or mitt, and transforms the paint texture from gritty to glass-smooth. Everything you apply after — wax, sealant, coating — works better because of it.