
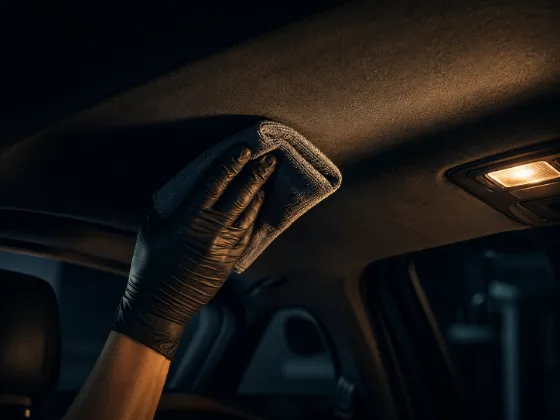
The headliner is the fabric panel that lines the ceiling of your car. Most are made from a thin woven fabric bonded to a foam backing, which is then bonded to a fiberglass or cardboard substrate. That foam backing is the problem. It deteriorates over time, and if you get it wet — really wet — it can separate from the substrate and you'll have a sagging ceiling that no amount of drying will fix.
This is why headliner cleaning requires a different approach than the rest of the interior. Upholstery extractors, steam cleaners cranked up high, and soaking the surface with product are all off the table. The goal is to clean the fabric while keeping the backing as dry as possible.
What You're Actually Dealing With
Most headliner fabric is a synthetic woven textile — polyester or a polyester blend — bonded to an open-cell foam layer with spray adhesive. The foam is what gives the headliner its shape and some sound damping. On older cars (generally anything over ten years old), that foam has been expanding and contracting with temperature cycles for years. The adhesive weakens. The foam becomes fragile.
The most common headliner problems: general grime and dust accumulation, grease spots near the dome light (hair product and hands), beverage splashes, and the dreaded sagging where the adhesive has already given up. The first three are cleanable. Sagging requires re-adhesion or replacement — cleaning alone won't fix it and can make it worse.
Before you clean anything, check the headliner for sagging or bubbling. Press gently in a few spots. If it feels spongy or detached, the foam is compromised. Clean it anyway if there are stains — just be even more conservative with moisture — but understand the sagging is a separate issue.
What You Need
You need an upholstery cleaner formulated for fabric, a few clean white microfiber towels, and a soft-bristled brush — an interior brush or a dedicated soft upholstery brush. Nothing with stiff bristles. Nothing abrasive.
A portable extractor or wet/dry vac with an upholstery attachment is useful for final removal, but it's not required. You can do a solid headliner clean with just spray cleaner, a brush, and microfiber towels.
Avoid aerosol foam cleaners. They look convenient but they introduce more liquid than you want, and the propellant can affect the fabric. Use a liquid spray that you can control.
The Process
Work in sections. Don't spray the entire headliner and then try to work across it — the product will sit too long in some areas and the moisture can spread to the backing before you get to it.
Step 1: Vacuum first. Use a soft brush attachment on a vacuum and go over the entire headliner before any liquid touches it. You want to remove loose dust and debris — anything you don't remove now will become a paste when it gets wet. Work gently, don't press hard, and vacuum with the nap of the fabric, not against it.
Step 2: Spray the cleaner on your brush, not the headliner. This is the single most important technique difference. Spraying directly onto the headliner saturates a spot immediately. Spraying onto the brush first gives you control over how much liquid contacts the fabric. Load the brush lightly — damp, not dripping.
Step 3: Agitate in straight lines, not circles. Work in one direction, following the grain of the fabric if you can identify it. Circular scrubbing can abrade the fabric and lift the pile. Straight, gentle strokes work the cleaner into the fibers without stressing the material.
Step 4: Blot immediately. As soon as you've agitated a section, blot with a clean, dry microfiber towel. Press firmly but don't rub. Rubbing spreads the contamination; blotting lifts it. Flip to a clean side of the towel as it picks up grime.
Step 5: Let it dry before moving on. If you have a stubborn spot, resist the urge to immediately hit it with more cleaner. Let the section you've just cleaned dry for a few minutes — you can move to a different area and come back. Repeated applications of cleaner on a wet surface just pushes moisture deeper into the foam.
Dealing with Specific Stains
Grease or oil spots — the kind from hair or hands near the dome light — respond better to a degreasing upholstery cleaner. Apply to the brush, work in gently, and blot. You may need two or three passes, letting the fabric dry slightly between passes.
Beverage stains — coffee, soda, energy drinks — can usually be addressed with the standard upholstery cleaner process. The key is getting to them before they fully set. A dried coffee ring that's been on the headliner for six months may lighten significantly but may not come out completely without leaving a watermark outline, which is sometimes worse than the stain.
Smoke residue is the hardest headliner problem. It's not a stain in one spot — it's a coating over the entire surface. You can clean a smoked headliner section by section with upholstery cleaner, and you'll see improvement, but getting it back to original requires the kind of saturation that risks the foam. Some detailers remove the headliner from the car to clean it properly — it's a real job but it's the right approach for severe smoke damage.
Temperature Matters More Than You'd Think
Headliners in hot cars are more vulnerable than headliners at room temperature. The heat softens the adhesive that bonds the foam to the substrate. If you park in direct sun and then immediately start cleaning, the headliner is already stressed. Let the car cool down with the doors open before you start. Cleaning in a shaded area or a garage is noticeably safer than working in direct sunlight on a hot day.
After Cleaning
Let the car air out completely with doors or windows open before driving. A damp headliner in a closed car gets musty quickly, and prolonged moisture trapped against the backing is exactly the condition that accelerates foam deterioration.
If the headliner came out well but has some areas that still look slightly different in sheen or texture, a light pass with a clean, dry microfiber towel — just buffing gently with no product — can sometimes even out the appearance as the fabric dries.
Don't use any protectant or conditioner on a fabric headliner. Leather conditioners, vinyl protectants, and similar products are for non-porous surfaces. On fabric, they'll leave a residue that attracts more dirt and can affect the color. The fabric doesn't need conditioning — it just needs to be clean.
When to Stop
If you press on the headliner and it sags, or you see bubbles forming, stop immediately. You've introduced too much moisture. Open all the doors, point a fan at the ceiling, and let it dry completely before evaluating. Sometimes minor sag from cleaning moisture resolves on its own as the adhesive dries. Sometimes it doesn't, and you'll need a headliner re-adhesion job — but you'll make it worse by continuing to clean.
A good headliner clean takes patience more than product. The constraint is moisture, not effort. Keep it dry, work in small sections, and blot more than you scrub.