
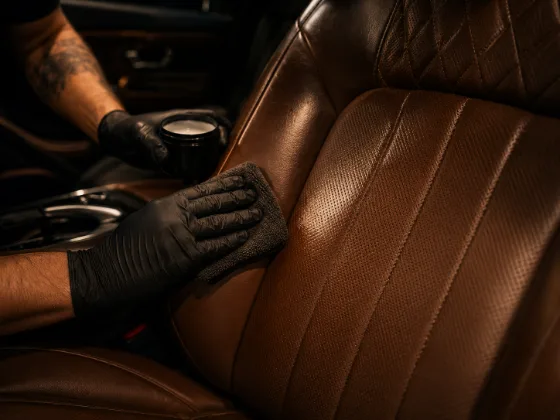
Leather seats are one of those surfaces where the wrong approach doesn't just produce mediocre results — it actively damages the material. The wrong cleaner, the wrong conditioner (or no conditioner at all), or cleaning too aggressively strips the natural oils and protective finish from the leather, leading to drying, cracking, and color fade that gets worse over time.
Here's what actually works, why it works, and what to stay away from.
Understanding What You're Cleaning
Before getting into products and methods, it helps to know what modern automotive leather actually is. Most "leather" car seats aren't the full-grain leather you'd find in high-end furniture. They're typically corrected-grain or semi-aniline leather, which has been processed, buffed smooth, and coated with a polyurethane or lacquer finish. This coating is what gives the seats their durability and uniform color — and it's also the layer you're actually cleaning when you clean leather seats.
True full-grain and aniline leather is found in some luxury vehicles (certain Rolls-Royce, Bentley, and high-specification BMW interiors, for example) and requires a more gentle approach because the surface coating is minimal or absent. If you're not sure which type you have, err on the side of gentle.
Understanding this coating matters because harsh chemicals — alcohol, ammonia, bleach, household cleaners — strip and degrade this protective layer. Once the coating is damaged, the leather underneath is exposed to moisture, body oils, and UV light, and it deteriorates quickly.
What You Need
Leather cleaner: A pH-balanced, purpose-formulated leather cleaner. Not all-purpose cleaner. Not interior wipes. Not saddle soap. A dedicated leather cleaner is formulated to clean the coated surface without breaking down the finish.
A soft brush: A soft-bristle brush — a dedicated leather brush, a soft upholstery brush, or a medium-soft paint brush — for agitating the cleaner into stitching and textured grain. A stiff brush will scratch the surface coating.
Microfiber cloths: Multiple. You'll use one to apply and agitate, one to wipe, and one to buff dry.
Leather conditioner: Applied after cleaning. This is non-negotiable. Cleaning removes surface oils and can leave the leather temporarily more vulnerable. Conditioning replenishes those oils and keeps the material supple.
The Cleaning Process
Vacuum first. Use a soft brush attachment to vacuum the seats thoroughly before any liquid goes on. Grit and debris ground into the surface during wet cleaning causes scratching. Get the loose material out first.
Test in an inconspicuous spot. If you're using a cleaner you haven't used on this leather before, apply a small amount to a hidden area — under the seat edge or at the back of a headrest — and wait a few minutes. Look for any color change, softening of the finish, or surface reaction. A good leather cleaner should produce no reaction other than cleaning.
Work in sections. Apply leather cleaner to a small section — roughly a 12-inch square — either directly to the surface or to your cloth, depending on the cleaner's instructions. Spread it across the section.
Agitate gently with the brush. Work the brush in small circular motions across the section, then straight passes along the stitching lines. The brush works the cleaner into the grain and gets into the thread of the stitching where a cloth can't reach. Don't scrub hard — the brush action should be controlled and deliberate, not aggressive.
Wipe clean. Use a clean, damp microfiber to wipe the section clean. You'll see the contamination on the cloth. If the cloth is very dirty after one section, fold to a clean face before doing the next section. You're wiping dirt off, not spreading it around.
Buff dry. Follow with a dry microfiber to remove any remaining moisture. Don't let the seats air-dry while soaking wet — sitting moisture can penetrate seams and cause issues over time.
Work the whole seat. Go section by section across the entire seat surface — seatback, seat cushion, headrest, side bolsters. The bolsters get the most wear and usually the most grime.
After Cleaning: Conditioning
Conditioning is the step that most people either skip or overdo.
Skip it, and the leather dries out over time — cleaning removes the oils that keep leather supple, and without replenishment, the material becomes stiff, prone to cracking, and loses its resistance to fading and staining.
Overdo it, and you get a tacky, greasy surface that attracts dirt, transfers to clothing, and looks wrong. The leather can only absorb so much conditioner. Excess just sits on the surface.
The right approach: apply conditioner in a thin layer with a clean microfiber or applicator pad. Work it in with light circular motions. Allow it to sit for 5-10 minutes and absorb. Then wipe off any excess with a clean microfiber. The result should be leather that feels noticeably softer and more supple but not wet or greasy.
Multiple thin applications over time beat a single heavy application. If you're doing routine maintenance, a light conditioning every 2-3 months is generally enough. If you're rehabilitating neglected leather, you might condition twice in the same session — one coat, let it absorb, wipe excess, second coat.
Specific Situations
Heavily soiled leather: Dark grime, ingrained body oils, stubborn staining. Use your leather cleaner at full concentration rather than diluted, and work the brush more thoroughly. On very stubborn spots, you can let the cleaner dwell for 30-60 seconds before agitating. Do not use more aggressive chemicals — if leather cleaner can't get it, you need to accept that or consult a professional.
Dye transfer: Blue jean dye transferring to light-colored leather is one of the most common complaints. It can sometimes be reduced with leather cleaner and a dedicated dye transfer remover, but it's difficult to fully eliminate once it's penetrated the leather. Prevention — regular cleaning before the dye has time to set — is much more effective than cure.
Ink: Act fast. Fresh ink is much easier to address than set ink. Apply leather cleaner immediately and work it with a soft cloth. For set ink, a leather cleaner may not be enough, and dedicated ink removers for leather exist — but test them extremely carefully, as they can damage the surface coating.
Cracked leather: If the leather has already cracked, cleaning and conditioning won't repair the cracks. Conditioning will improve the flexibility of the surrounding material and may prevent new cracks, but existing cracks need leather filler or a professional restoration.
What Not to Use
This list matters because several commonly available products actively damage automotive leather:
- All-purpose cleaner: Often alkaline or mildly acidic — both can degrade the surface coating over time with repeated use.
- Alcohol-based wipes or cleaners: Alcohol strips the protective coating from leather quickly. This includes disinfectant wipes, which became a problem during the pandemic when people sanitized their interiors with alcohol wipes and then wondered why their leather looked dull and degraded.
- Saddle soap: Formulated for raw, unfinished leather goods — not for the coated leather in modern car seats. The high soap content can damage the finish over time.
- Household leather furniture cleaners: Often formulated for different leather types and finishes than automotive leather. Stick with products specifically designed for car interiors.
- Silicone-heavy conditioners: Some budget conditioners are primarily silicone. Silicone makes the leather feel slick and look shiny but doesn't actually penetrate and condition the material. It's a surface coating masquerading as a conditioner.
How Often to Clean
Light maintenance cleaning — wiping down surfaces with a damp microfiber, keeping grime from building up — can happen as part of routine interior upkeep. A thorough clean with brush agitation every 3-4 months is appropriate for most daily drivers. Conditioning every 3-6 months keeps the leather supple.
Vehicles used by families with young children, dogs, or heavy daily use should be cleaned more frequently. The grime that builds up on leather from regular use — body oils, food, general contact — becomes harder to remove the longer it sits. Regular cleaning means each session is easier.