
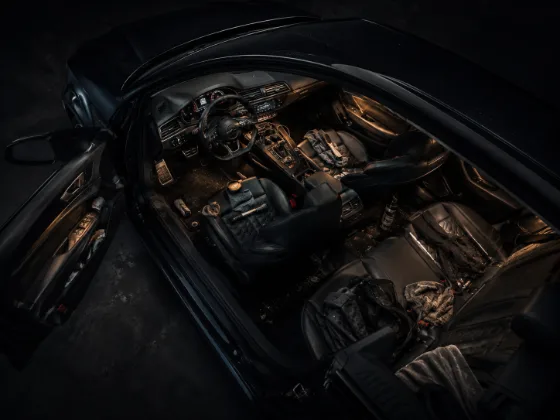
Interior detailing is one of those things people approach backwards. They start wiping surfaces before they've dealt with loose debris. They condition leather before cleaning it. They vacuum after they've cleaned hard surfaces and knocked crumbs everywhere. Then they wonder why the result is mediocre.
Order matters in detailing. The right sequence means every step builds on the last. Here's how to work through an interior correctly.
Why Order Matters
The principle is simple: work top to bottom, loose debris before wet cleaning, dry before damp, and never apply protection to a surface you haven't cleaned first.
If you wipe down the dash and then brush out the vents, you've just sprayed dust all over the surface you already cleaned. If you condition leather before cleaning it, you're sealing in the oils and body soil from whoever was sitting in that seat. If you vacuum at the end after cleaning hard surfaces, you're picking up everything that fell during those steps — but you've also had contaminants on the floor the whole time you were climbing in and out.
The right order eliminates rework and gets you a cleaner result in less time.
Step 1: Remove Everything That Doesn't Belong
Before you clean anything, get everything out of the car that doesn't live there. Floor mats out. Trash out. Kids' toys, receipts, phone chargers, water bottles, gas station sunglasses — out. You can't properly clean around clutter, and you'll almost certainly miss spots if you're working around stuff.
Floor mats get set aside and cleaned separately. They get more contamination than almost any other surface in the car, and cleaning them outside the vehicle — where you can really work them — gives better results than trying to scrub them in place.
Step 2: Dry Vacuum, Top to Bottom
The second step before any wet product touches anything: vacuum. Thoroughly. Top to bottom.
Start at the headliner and work down — sun visors, coat hooks, pillar trims. Then seats. Then the dash, center console, door panels. Floor last. Use crevice tools to get into seat tracks, console gaps, and door pockets. The goal is to remove all loose particulate before any cleaning solution goes on.
If you vacuum after you wet-clean, you're doing it backwards. Vacuum first, so the wet cleaning is only dealing with bonded dirt and stains — not a mixture of loose grit and liquid.
Step 3: Vent and Tight-Space Detail
HVAC vents, buttons, and tight trim gaps need attention before you wipe any of the surrounding surfaces. Use a detailing brush — a clean paint brush, a parts cleaning brush, or a dedicated interior brush — to dislodge dust from vents and crevices. The dust you knock loose will fall onto the dash, door panels, and center console. That's fine. You'll wipe those surfaces after.
Keyboard buttons on infotainment screens, stitching on the steering wheel, textured plastics that trap grime in their grain — all of this gets brushed before surface wiping. It's much faster to brush debris out and then wipe it off than to try to pick it out of every crevice with a cloth.
Step 4: Clean Hard Interior Surfaces
Now that loose debris has been removed, clean the hard surfaces. Dashboard, center console, door panels, trim pieces. Use an appropriate interior cleaner — something that breaks down skin oils, food residue, and grime without leaving a greasy or sticky residue behind.
Work panel by panel. Spray the cleaner on a microfiber or directly on the surface (depending on the surface — more delicate materials like screens prefer application via cloth), wipe, and follow with a dry microfiber to ensure no residue is left behind. Go in sequence: dash first, then center console, then door panels.
Screens — touchscreens, instrument clusters, rearview camera screens — need their own attention. Use a dedicated screen cleaner or a slightly damp microfiber only. No alcohol-based cleaners unless the manufacturer specifies it's safe, and no solvent-based cleaners. Modern touchscreens have oleophobic coatings that get destroyed by harsh chemicals.
Step 5: Steering Wheel
The steering wheel gets a dedicated step because it gets more direct hand contact than any other surface in the car. It's covered in skin oils, hand cream, sweat, and whatever else has been on your hands over the past year. It needs to actually be cleaned, not just wiped.
The process depends on the material — leather steering wheels need a leather cleaner, not a general interior wipe. Alcantara or suede-wrapped wheels need even more care. Polyurethane and vinyl wheels can handle slightly more aggressive cleaners. Work around the wheel in sections, cleaning the rim, spokes, and hub.
Step 6: Seats
Seats get their own stage because the cleaning process differs significantly by material, and because they're typically the largest surface area in the interior.
Leather seats: clean with a leather-specific cleaner using a soft brush or microfiber, working into the grain and stitching. Wipe clean. Allow to dry before conditioning.
Fabric seats: depending on how soiled they are, either brush and vacuum again or use a fabric cleaner applied with a soft brush. Agitate, then extract or blot — don't just wipe, because pushing liquid around doesn't lift the contamination out of the fabric. More on this in the carpet and extraction article.
Suede and Alcantara: completely different process, covered separately.
Step 7: Floor Carpets and Floor Mats
Floor carpets come after everything above them has been addressed. By now, any debris knocked off seats or door panels during cleaning has had a chance to fall to the floor. Vacuum again — a focused, thorough vacuum of the carpet and floor mat areas. Pay attention to the area under the seats, around pedals, and in footwells.
For stains or heavier soil, this is where carpet extraction comes in. A hot water extractor applied to carpet pulls contamination out of the fiber rather than just pushing it around. It's the difference between a carpet that looks cleaner and a carpet that actually is cleaner.
Floor mats that were set outside earlier get cleaned now too — vacuum, shampoo if needed, and allow to fully dry before putting them back in.
Step 8: Glass
Interior glass is one of the last steps because everything else you've done — cleaning, wiping, extracting — releases vapor and mist that settles on the glass. Cleaning glass first just means cleaning it twice.
Interior glass has a particular problem: film buildup from off-gassing plastics. New cars are especially prone to this — that "new car smell" is partly the volatile compounds evaporating from plastics and adhesives, and they leave a thin film on the glass that ordinary glass cleaner doesn't cut well. Use a dedicated automotive glass cleaner and two cloths: one damp to clean, one dry to buff. Work in overlapping passes to avoid streaks.
Windshields get extra attention. The A-pillar edge and corners near the dash are notorious for missed spots. Work those corners with a folded cloth to get all the way to the edge.
Step 9: Condition and Protect
The final step is applying any conditioners or protectants to surfaces that need them — leather conditioner to leather after it's been cleaned and dried, interior dressing to plastics if you're using one, UV protectant to surfaces that get direct sun exposure.
Apply conditioner to leather in thin coats and allow it to absorb before wiping off excess. More isn't better — thick conditioner leaves residue and attracts dirt. Light, repeated conditioning over time is better than saturating the leather once.
Interior plastic dressings: choose a matte or satin finish product unless you specifically want a high-gloss look. Glossy plastic dressings look tacky on most interiors and create glare on the dash that reflects into the windshield. If in doubt, leave the plastic undressed — a clean matte plastic looks better than an overdressed shiny one.
Don't Skip Drying Time
The most common mistake at the end of an interior detail: putting the floor mats back in before they're dry and closing everything up. Damp materials in a closed car create a humid environment that leads to mold, mildew, and musty smells. Leave doors open, leave floor mats out, and let everything dry completely before closing the car up.
If you're in a humid climate or detailing in cool weather, a small fan pointed into the car significantly speeds drying time and prevents the musty smell problem entirely.