
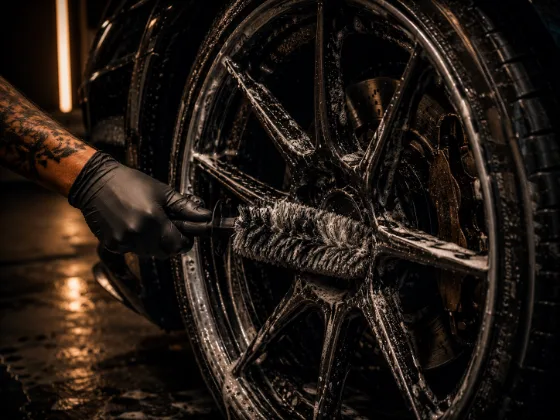
Wheels are one of the most contaminated surfaces on a car. They live directly behind the brakes, collecting brake dust, road tar, and the kind of embedded grime that takes real chemistry to cut through. They also have some of the most varied and damage-prone finishes on the car — polished, painted, chrome-plated, powder-coated, and clear-coated aluminum all require different handling. Use the wrong cleaner or the wrong brush and you can etch a polished finish, strip a coating, or leave permanent scratches that are visible from across a parking lot.
Cleaning wheels correctly is less about effort and more about having the right products and tools for the specific finish you're working with.
Know Your Wheel Finish First
Before you spray anything on a wheel, identify the finish type. This determines which cleaners are safe and which tools you can use.
Clear-coated aluminum wheels. The most common finish on modern cars. The aluminum is machined or polished, then coated with a clear coat similar to automotive paint. These look like they have a shiny, factory-perfect appearance and are usually a silver or dark metallic color with some depth. Clear-coated wheels can be cleaned with most wheel cleaners that aren't highly acidic. They scratch like painted surfaces — so use soft brushes and microfiber, not stiff nylon or abrasive pads.
Painted wheels. Many OEM wheels and all-black wheels are simply painted and clear-coated. These are the most forgiving finish type and tolerate a range of cleaners and tools. Same care as painted bodywork — avoid aggressive acids and abrasive scrubbing.
Polished aluminum wheels. Bare, polished metal with no clear coat. These look extremely shiny and mirror-like, and they show fingerprints easily. Acid-based wheel cleaners will permanently dull or etch polished aluminum. These wheels need either a pH-neutral wheel cleaner or a dedicated polished aluminum cleaner. Also the most prone to water spotting — dry them immediately after cleaning.
Chrome wheels and chrome-plated wheels. Real chrome plating is applied over nickel-plated metal. It looks very shiny and slightly blue compared to polished aluminum. Avoid highly acidic cleaners on chrome — they can cause pitting over time. Most chrome responds well to pH-neutral car shampoo and a soft brush.
Powder-coated wheels. An increasingly common aftermarket and OEM finish. The color is baked on as a dry powder and is generally more durable than liquid paint. Powder coating tolerates a wide range of cleaners including mild wheel-specific products, but harsh acids can affect the coating's sheen over time. Use pH-neutral or mildly alkaline wheel cleaners.
Matte or satin finish wheels. Becoming more common as an OEM option. These have intentionally low gloss and are the most sensitive to product choice — wax, polish, and glossy product residue will create uneven sheen on a matte surface. Use cleaners that don't leave any protective film behind, and rinse thoroughly.
pH and Wheel Cleaners: The Chemistry That Matters
Wheel cleaner chemistry falls into two main categories: acid-based and alkaline/pH-neutral.
Acid-based wheel cleaners (often containing hydrofluoric acid or other acids) are aggressive. They dissolve brake dust and iron contamination effectively but can etch polished aluminum, damage chrome over time, and must never be left to dry on the wheel surface. These are generally reserved for specific situations — heavily contaminated wheels with baked-on brake dust that nothing else has moved, used carefully and rinsed promptly.
pH-neutral and alkaline wheel cleaners are the better choice for regular use. They're effective on normal brake dust and grime accumulation, safe on all but the most sensitive finishes, and don't create the etch risk that acid-based cleaners do. The tradeoff is that they may require more agitation and dwell time on heavily contaminated wheels.
Iron removers — products that contain active chemistry that reacts with iron particles (brake dust is largely iron oxide) and causes them to dissolve — fall between these categories. They're highly effective on brake dust specifically, work at a near-neutral pH in most formulations, and are safe on nearly all wheel finishes. The red-purple reaction you see when iron remover contacts brake dust is iron chelation in action.
The Right Tools
The brush is where most wheel cleaning damage happens. Stiff nylon brushes, wire brushes, and abrasive sponges scratch wheel finishes. The specific tools that work without damaging:
Soft-bristle wheel brush. Long-handled, with soft synthetic or natural bristles — sometimes called "boar's hair" brushes for wheel faces. These reach into the face of the wheel and behind spokes without scratching. The bristles flex rather than scrub, which is what you want.
Lug nut brush / small detail brush. For cleaning around lug nut seats, valve stems, and tight areas between spokes where a larger brush won't fit. A soft toothbrush works if you don't have a dedicated brush — the key is soft bristles.
Barrel brush. A cylindrical brush for cleaning inside the wheel barrel — the inside surface of the rim that faces the brakes. This area accumulates heavy brake dust and is often neglected. The barrel brush reaches inside without requiring you to remove the wheel.
Microfiber towels. For final wiping and drying, same as any paint surface. Don't use the same towels you use on the wheel on your paint without washing them — brake dust is abrasive and will scratch paint if transferred.
The Cleaning Process
Clean wheels before washing the car, not after. The rinse water and contamination that comes off the wheels during cleaning will splash onto the lower panels. If you wash the car first and then clean the wheels, you're recontaminating paint you just cleaned.
Step 1: Rinse the wheel. Use a strong rinse from a hose or pressure washer to remove loose brake dust and surface grime. Get behind the spokes, behind the wheel, and inside the barrel. Rinsing first removes the loose contamination before product contact, making the cleaner more effective on what's bonded to the surface.
Step 2: Apply wheel cleaner to a cool wheel. This is critical. Hot wheels from recent driving cause product to flash off before it can work, and some cleaners can damage finishes when applied hot. Let the car sit for at least 30 minutes after driving before cleaning wheels. Apply cleaner to the face, barrel, and spokes. Let it dwell for the time specified on the label — typically 30–60 seconds. Don't let it dry.
Step 3: Agitate with appropriate brushes. Start with the barrel brush on the inside of the rim. Then the face brush on the wheel face and spokes. Use the small detail brush around lug nut seats. Work with gentle but thorough motion — you're helping the cleaner do its job, not mechanically scrubbing the contamination off. Let the chemistry work.
Step 4: Rinse thoroughly. Remove all cleaner residue completely. Pay attention to lug nut recesses and tight areas between spokes — cleaner residue that doesn't get rinsed can dry and stain, and on acid-based cleaners, residue left in recesses can cause localized etching.
Step 5: Dry. Polished aluminum in particular needs immediate drying to prevent water spots. A clean microfiber towel or forced air works. Dry the entire wheel including the barrel — wet brake dust that sits can accelerate the recontamination process.
Protecting Wheels After Cleaning
A wheel sealant or wax applied to a clean, dry wheel makes subsequent cleaning dramatically easier. The protection creates a barrier between the finish and brake dust, preventing it from bonding as aggressively to the wheel. Clean wheels with a protectant applied every few weeks take a fraction of the effort to clean compared to unprotected wheels that have allowed brake dust to bond over months.
Spray wax or sealant applied to the wheel face is the quickest approach. Avoid getting product on brake rotors or calipers — those surfaces need to be free of oil-based product for proper brake function.