
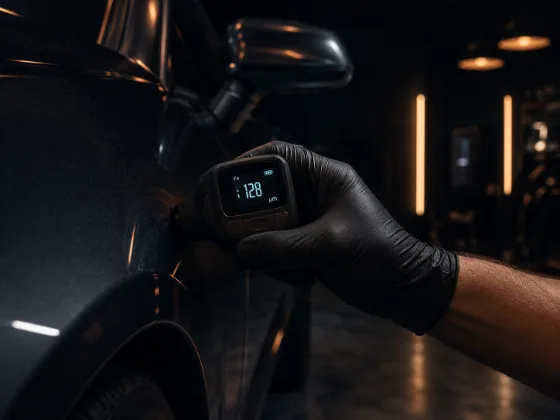
A paint thickness gauge (PTG) is one of the most important tools a detailer can own, and one of the least discussed outside professional circles. It measures how much paint is sitting on the metal beneath — and before you start correcting paint, knowing that number determines how aggressively you can work, how many passes are safe, and whether you should touch a panel at all.
Polishing removes material. Very little per pass, but it removes it. Ignore the numbers underneath your machine and eventually you'll cut through clear coat — an expensive, irreversible problem. A PTG makes that mistake nearly impossible.
What a Paint Thickness Gauge Actually Measures
A PTG measures the total depth of paint on a metal substrate, reported in microns (µm). One micron is 0.001 millimeters — the measurements you're working with are genuinely tiny. The gauge works by sending a magnetic or eddy-current signal through the paint layers into the metal beneath and calculating depth based on the signal return. Magnetic gauges work on steel panels; eddy-current gauges work on aluminum.
The gauge reads the total paint stack from the metal up: primer, base coat, and clear coat all contribute to the reading. It doesn't tell you individually how thick each layer is — just the combined total. But combined total is what matters for polishing decisions, and with some reference knowledge, you can infer a lot from the number you see.
What Factory Paint Thickness Looks Like
Factory paint specs vary by manufacturer, vehicle segment, and paint color, but general ranges apply. Total paint thickness on a factory vehicle typically runs between 100 and 200 microns. Of that total, clear coat is usually the top 40 to 70 microns. Primer typically accounts for 20 to 40 microns. Base coat contributes 10 to 30 microns.
Luxury manufacturers often apply thicker paint — a new BMW or Mercedes may read 130-160 microns total. Economy vehicles can run thinner, sometimes in the 90-120 micron range. Older domestic vehicles, particularly American trucks from the 1980s and 1990s, often have substantially thicker paint than modern vehicles.
These numbers give you a reference. When you pick up a gauge and take your first reading, you're comparing what's there now against what factory spec should look like — and the gap tells you what's been done to this paint's history.
Reading the Gauge: What Numbers Mean
A reading in the expected factory range for the vehicle — 100-160 microns depending on make — means you're likely looking at original paint in reasonable condition. You have normal polishing headroom. Proceed with appropriate product selection for the defects you see.
Readings significantly above factory spec — 200, 250 microns or higher — indicate a respray. Someone applied additional paint over the factory finish. Resprays can be thick and workable, or they can be poorly applied and thin in spots with thick buildup elsewhere. High readings aren't necessarily a problem, but they tell you this panel has been refinished and you should map it thoroughly for variation.
Low readings — below 80 microns, especially 60-70 and under — are the ones that should stop you. Something has already thinned this paint, either previous polishing, wet sanding, or a thin respray. If the total is 70 microns and clear coat is typically 40-70 of that total, you may be working with almost no clear coat headroom. Aggressive correction is off the table.
Readings that vary dramatically across a single panel — 140 microns in the center, 80 microns near the edge — indicate either previous sanding that was heavier in spots, or a respray with uneven application. Both scenarios call for caution and lighter product selection.
Variation Across a Single Car
Paint thickness is not uniform across a vehicle, even from the factory. Panels that are easier to spray consistently — large flat doors, hoods, roofs — typically read closer to spec. Panels with complex curves, edges, or tight geometry — A-pillars, door jambs, bumper edges, around wheel arches — are often thinner because paint runs and doesn't build up on sharp edges and convex surfaces.
This matters because you're making polishing decisions at the panel level, not the car level. The door may read 140 microns and be completely safe for compounding. The leading edge of that same door may read 90 microns and require a much lighter approach or no correction work at all. Taking readings across the full panel, including edges, gives you a map of where you can work and where you can't.
Roof panels on vehicles that have been regularly polished by someone who wasn't checking thickness are a classic problem area. The roof is the most visible horizontal surface, so it gets polished aggressively and often. Vehicles with 20 years of detail history can have paper-thin clear coat on the roof even if the doors still read normal.
After-Market Resprays
Body shop resprays introduce a layer of variability that factory paint doesn't have. A quality respray from a professional shop using proper primer, base, and clear coat steps may read similar to factory spec. A cheap single-stage respray may be thin and poorly adhered. A "blow over" respray — clear coat shot over existing paint without stripping — adds material on top of whatever was there, which may already have been compromised.
High PTG readings tell you a respray happened, but they don't tell you the quality of the work or the adhesion between layers. Thick resprayed paint can look fine but be prone to peeling at the edges. Thin resprays are obvious under the gauge. Either way, proceed carefully and do a small test pass in an inconspicuous area before committing to full-panel correction.
How Much Material Polishing Removes
This is where the numbers become reassuring, not terrifying. A single polishing pass with a machine polisher removes somewhere between 0.1 and 1 micron of clear coat, depending on the product, pad, speed, pressure, and number of passes. A full compound-and-polish correction session on a panel might remove 2-5 microns total on the high end.
On paint reading 130 microns with a 50-micron clear coat, you have meaningful headroom for multiple correction sessions over the life of the vehicle before you approach any risk threshold. The math is reassuring on healthy paint.
The math stops being reassuring when you're starting with 60 total microns, or paint that's already been corrected a dozen times. Each session takes a little more material. Without measuring, you have no way of knowing how many sessions of headroom you actually have left.
The Safe Threshold
The general guidance among professional detailers is to avoid aggressive cutting when total paint thickness drops below 80 microns, and to treat anything below 60 microns as a no-correction zone — surface decontamination and protection only. These aren't hard limits written in physics, but they're conservative thresholds that protect you from accidentally cutting through on a single panel pass.
When you're working near those thresholds, light polishing pads and finishing polishes replace cutting pads and compounds. Multiple light passes are safer than single heavy ones. You can still improve the appearance of thin paint — light swirl removal, gloss enhancement — without aggressive material removal.
Paint that's below 60 microns total is often visibly compromised anyway: transparency through the base coat, peeling at edges, visible thinning in sunlight at certain angles. These are signs that mechanical correction is the wrong call regardless of what the gauge tells you.
Mapping a Car Before Starting
A professional pre-correction PTG assessment means taking readings across every panel of the vehicle. Not one reading per panel — multiple readings across different areas of each panel, including the center, edges, and any areas with visible damage.
Take readings on each door at center, top edge, bottom edge, and both vertical edges. Hood at center, each corner, and the leading edge. Roof at center and each corner. Trunk lid the same way. Bumpers separately. Pillars and rockers separately.
Record the low reading for each panel. That low reading — not the center average — is what determines your approach for that panel. The thinnest point is always your constraint. You can be more aggressive where it's thick; you're limited to lighter work everywhere the panel goes thin.
Most professional detailers develop a shorthand for this: mark low-reading panels with tape flags before starting, so the entire job has a visible reference for where the approach changes.
When PTG Readings Change Your Approach
When a panel reads low, you shift to lighter pads and less aggressive products. If you planned to compound and polish, you drop to a light polish only and accept partial correction rather than risk cutting through. If correction isn't achievable without risk, decontamination and protection are the job instead.
Spots within a panel that read significantly lower than the surrounding area get treated as their own zone. Same panel, but you skip the machine polisher over a 90-micron patch and address the center 130-micron area normally. This kind of panel-mapping-informed work is what separates a careful detailer from someone who just runs the machine and hopes for the best.
Choosing a Paint Thickness Gauge
The gauge market ranges from $30 to several hundred dollars for professional-grade instruments. In the $30-$100 range, you can find gauges that read accurately enough for hobbyist and semi-pro use. Look for a gauge that reads in microns (some cheaper gauges only display in mils — convert by dividing by 39.37), that works on both steel and aluminum (dual-mode is common), and that has a probe tip with a flat contact area rather than a sharp point for stable readings.
Calibrate against a known-thickness shim or a panel you have factory data for before trusting new readings. Consumer-grade gauges can drift. A quick calibration check against a known reference keeps your readings meaningful.
Professional gauges from brands like ElcoMeter, DeFelsko, or PosiTest are accurate to fractions of a micron and worth the investment for professional detailers who make go/no-go decisions based on gauge readings every day. For a hobbyist doing occasional correction, a mid-range $50-$80 gauge reads accurately enough to make informed decisions.
The Rule: Measure Before You Polish
On any car you haven't polished before, take PTG readings before you start. On a car you've polished many times, take readings periodically to track how much material you've removed over time. If you're doing pre-purchase inspections, PTG readings across every panel reveal repaints, accident damage, and prior correction history more reliably than visual inspection alone.
Polishing without measuring is making correction decisions with incomplete information. The gauge costs less than an hour of shop time and takes five minutes to run across a car. There's no reason not to know the numbers before you start.