
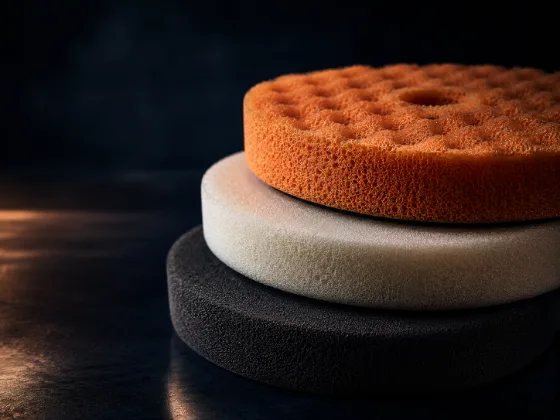
You can have the best compound on the market, a perfectly prepped surface, and solid technique — and still get lousy results because the pad was wrong for the job. Or because it was caked with old residue. Or because the foam gave up three details ago and nobody noticed. The pad is half the correction equation, and it's the half that gets neglected.
This guide is the hands-on side of pad work: how to pick the right one, how to keep it performing during a detail, how to wash it properly afterward, and how to know when it's time to toss it. If you want the theory behind foam types and cell structures, that's covered in the polishing pads explained guide. This is the operational companion — what you actually do with pads in the real world.
Foam vs. Microfiber: A Quick Recap
There are two families of polishing pads, and they behave differently enough that the choice matters before you even think about aggressiveness.
Foam pads are what most people start with, and for good reason. They're forgiving. The foam compresses under pressure, which gives you a margin of error on technique. They spread product evenly, they're easy to clean, and they come in a clear range from aggressive to soft. If you're newer to machine polishing or you're doing routine maintenance details, foam is the safe default.
Microfiber pads cut harder than foam pads at the same aggressiveness level. The fiber tips act as additional abrasive points beyond what the compound provides, so a microfiber cutting pad paired with a compound will remove more material than a foam cutting pad with the same compound. The trade-off is that microfiber runs cooler — the fiber structure dissipates heat better than solid foam — which makes microfiber a strong choice for heavy correction on soft or heat-sensitive clear coats.
The practical difference: reach for foam when the job is light-to-moderate and you want predictability. Reach for microfiber when you need serious cut without cooking the paint. Most detailers keep both on hand and choose based on the job.
The Three Aggressiveness Tiers
Every pad falls into one of three categories. The names are straightforward, but knowing what each tier is actually for — and what it's not for — is where people go wrong.
Cutting Pads
Cutting pads are for heavy defects. Deep swirl marks that catch your fingernail. Sanding marks from wet sanding. Oxidation that's dulled the paint beyond what a polish can handle. They're firm, open-cell foam (or microfiber) designed to move compound aggressively across the surface and remove material.
A cutting pad is never the last step. It removes defects, but it leaves its own marks behind — micro-marring, haze, buffer trails. You always follow a cutting step with at least one refinement step. If you stop after cutting, the paint will look worse under certain lighting than it did before you started.
Polishing Pads
This is the workhorse tier. Medium-density foam that balances correction with surface quality. A polishing pad paired with a good polish handles the most common scenario in detailing: light-to-moderate swirls on a daily driver that's been washed carelessly over the years.
For a lot of cars, a polishing pad is all you need. One-step correction — polish on a polishing pad, wipe, inspect, protect. No compound stage, no multi-step process. That's the beauty of the middle tier: it covers the broadest range of real-world paint conditions without requiring you to step up or step down.
Finishing Pads
Finishing pads are soft and gentle. They don't remove defects — they refine the surface left behind by cutting and polishing stages. A finishing pad with a finishing polish eliminates the micro-marring and haze that more aggressive steps leave behind, bringing the clear coat to full gloss and clarity.
Finishing pads also do double duty for product application. Glazes, sealants, spray coatings — anything you want to spread evenly by machine without any cutting action. Run the machine at low speed with a finishing pad and you get smooth, consistent coverage across the panel. The soft foam conforms to curves and edges without concentrating pressure the way a firmer pad would.
Skipping the finishing step is one of the most common mistakes in paint correction. The car looks great in the garage, then you pull it into sunlight and see haze and holograms everywhere. That's what happens when you compound or polish and don't finish. Always step down to a finishing pad before you call a correction done.
Pad Sizes: When to Use What
Pads come in three practical size categories, and each exists for a reason.
5-6 inch pads are the standard for panel work. Hoods, roofs, doors, fenders, trunk lids — any broad surface where you can make full passes with consistent pressure. A 5-6" pad on a matching backing plate covers ground efficiently and produces even results. This is what you'll use for 80% of any detail.
3 inch pads are for tight spots. A-pillars, door jambs, tight curves around mirrors and bumper contours, the area between body lines where a full-size pad bridges across the gap instead of sitting flush. A 3" pad on a 3" backing plate gives you the control to work these areas without the pad bouncing off edges or applying pressure unevenly.
Spot pads (1-2 inch) are specialty tools for very confined areas or isolated defects. A single scratch on a fender that doesn't need the whole panel corrected. A tight radius where even a 3" pad won't sit flat. Most people don't need spot pads regularly, but when you do need one, nothing else works.
The sizing rule: the pad should be about 1 inch larger in diameter than the backing plate. A 5" pad on a 4" plate. A 6" pad on a 5" plate. This overhang lets the pad edge flex rather than transmitting the hard edge of the backing plate into the paint. If the pad is the same size as the plate, you risk leaving backing plate marks on curves and edges.
Pad-to-Defect Matching
This is the decision that determines whether the correction works or whether you waste time and product getting nowhere. Matching pad aggressiveness to defect severity is the single most important skill in paint correction.
The rule: start with the least aggressive combination that could plausibly handle the defect. You can always step up to more aggressive if it's not working. You can't un-cut paint that you've removed too much of.
Here's the step-down logic for a typical correction:
- Heavy defects (deep swirls, sanding marks, oxidation): Start with a cutting pad + compound. Work a test spot first. If it removes the defects, step down to a polishing pad + polish to refine, then a finishing pad + finishing polish to bring up full clarity.
- Moderate defects (visible swirls under direct light, light haze): Start with a polishing pad + polish. One stage may be enough. If not, step up to a cutting pad for the first pass, then come back down. Always finish with a finishing pad.
- Light defects (faint swirls visible only under very direct light, minor haze): A polishing pad + polish may handle it in one step. Or go straight to a finishing pad + finishing polish if the defects are truly minor. Inspect under strong lighting to confirm.
Two things people get wrong here. First, they start too aggressive — jumping to a cutting pad and compound for swirls that a polishing pad would handle cleanly. That means more work (you now need two follow-up stages instead of one) and more material removed from the clear coat unnecessarily. Second, they skip the finishing step. A polishing pad will leave micro-marring that's invisible in the garage but screams under direct sunlight. The finishing step takes ten minutes per panel. Do it.
Always do a test spot before committing to the whole car. Pick a section of the worst panel, correct it with your planned pad-and-product combination, wipe it clean, and inspect under direct light. If the defects are gone and the surface is clean, you've got your process. If not, adjust before you've spent three hours on the wrong approach.
Priming a Fresh Pad
A brand-new foam pad — or one that's been fully washed and dried — is bone dry. Dry foam is thirsty. If you apply compound or polish directly to a dry pad, the foam soaks up a significant portion of the product before it ever reaches the paint. Your first pass will be starved of product and won't cut or polish properly.
The fix is simple: give the pad a light mist of water before the first application of product. Not soaking wet — just a few spritzes from a spray bottle across the pad face. Enough to dampen the foam so it's not absorbing your polish. Then apply your product normally.
You only need to do this on a fresh or freshly-washed pad. Once the pad has been used and has product worked into the foam, it won't absorb aggressively anymore. If you're rotating through pads during a detail and grab a fresh one from the shelf, mist it. If you cleaned a pad with compressed air between panels and it's still damp with product, skip the misting — it's already primed.
Microfiber pads are less prone to this issue since the fiber structure doesn't absorb product the same way foam does, but a quick mist doesn't hurt.
Cleaning Pads During a Detail
Mid-detail pad cleaning is not optional — it's part of the process. A loaded pad doesn't cut, doesn't polish, doesn't do anything useful. It just drags spent product and dead abrasive across the surface, generating heat and friction without removing defects. You need to clean pads regularly between sections, and you need to know which method works for which situation.
Compressed Air
The fastest method and the go-to for foam pads. An air gun blows spent product out of the foam's cell structure without getting the pad wet. Hold the pad face-up (off the machine or on it with the machine off) and sweep the air across the surface from center to edge. Don't hold the gun in one spot — keep it moving. You'll see a cloud of dried residue come off the pad.
Compressed air works best on foam pads because the cell structure releases residue readily under air pressure. It's less effective on microfiber pads because the fibers trap residue more tightly. The advantage of compressed air is that it keeps the pad dry, so you can immediately apply fresh product and keep working without waiting for anything to dry.
Pad Cleaning Brush
A stiff-bristle pad cleaning brush is more thorough than air. Put the pad on the machine, set the machine to its lowest speed, hit the pad face with water or a pad cleaning spray, and work the brush across the spinning pad. The bristles dig into the foam and break up compacted residue that air alone won't dislodge.
This method works well for both foam and microfiber pads. It's the right move when a pad has been running hard through several panels and compressed air isn't getting it clean enough. The downside is that the pad will be damp after brushing, so you may need to let it spin for a few seconds to shed excess water before applying fresh product.
Pad Cleaning Spur
A pad cleaning spur — the tool with the small metal teeth — is particularly effective for microfiber pads. The teeth get between the fibers and pull out compacted residue that brushes and air can't reach. Use it gently; the goal is to lift residue out of the fibers, not to rip the fibers out of the pad. Light pressure, working across the pad face methodically.
Spurs work on foam pads too, but they're not necessary if compressed air or a brush is getting the job done. They really earn their place in the toolkit on microfiber pads during heavy correction, where the fibers load up fast and resist other cleaning methods.
When Cleaning Isn't Enough
There comes a point during a detail where cleaning a pad isn't restoring its performance. You clean it, apply fresh product, start polishing, and the results are noticeably worse than they were with a fresh pad. The foam feels harder. The cut drops off. The residue builds back up faster than it should.
That's your signal to swap in a fresh pad. Don't push through with a spent pad — you'll waste time and product chasing results you won't get. This is why having multiple pads of the same type on hand matters. For a full correction on a sedan, plan on having at least 3-4 pads of each type you're using. Swap as needed, wash them all at the end.
Post-Detail Pad Washing
Cleaning pads after a detail isn't just about keeping them neat — it's about preserving the foam structure and performance for next time. Dried compound and polish residue degrades foam. It stiffens the cell structure, reduces the pad's ability to absorb and release product, and eventually makes the pad useless. Don't let pads sit dirty.
Wash pads the same day you use them. Don't toss them in a bucket and forget about them for a week. Dried residue is dramatically harder to remove than fresh residue, and it causes more damage to the foam the longer it sits.
Water temperature matters. Use cold or lukewarm water — never hot. Hot water breaks down the adhesive that bonds the foam to the backing plate, and it degrades the foam's cell structure over time. You won't notice it after one wash, but after several hot-water washes the foam will start feeling softer and less resilient than it should.
Use a gentle detergent. Dish soap works in a pinch, but a dedicated microfiber and pad detergent is better. Regular laundry detergent often contains fabric softeners and fragrances that leave residue in the foam — residue that can transfer to paint on the next use. Whatever you use, it should be mild and rinse clean.
Hand washing is safest. Work the pad under running water, squeezing and releasing the foam to flush product out. You'll see the water run colored at first — keep going until it runs clear. For stubborn residue, let the pad soak in soapy water for 15-20 minutes before working it by hand.
Machine washing works if you're careful. Cold water, gentle cycle, mild detergent. Put pads in a mesh laundry bag or pillowcase to protect them from the agitator. No fabric softener, no dryer sheets. The convenience of machine washing is worth it if you're running through a lot of pads, but hand washing gives you more control and is gentler on the foam.
Drying: air dry or low heat only. Lay pads flat or stand them on edge in a well-ventilated area. Don't stack wet pads — they'll mildew. If you must use a dryer, lowest heat setting only, and pull them as soon as they're dry. High heat warps foam, weakens adhesive, and can delaminate the pad from its backing. Air drying takes longer but costs you nothing and preserves the pad.
When to Retire a Pad
Pads are consumables. They wear out, and a worn pad doesn't just perform worse — it actively causes problems. Holograms, uneven correction, marring, wasted product. Knowing when to retire a pad saves you from chasing results that the pad physically can't deliver anymore.
Here are the signs:
Foam saturated with product that won't wash out. You've washed it, soaked it, worked it by hand — and the foam is still stiff and discolored. The cells are permanently clogged with dried compound or polish. A saturated pad can't absorb or release product properly, which means inconsistent cut and unpredictable behavior on the paint.
Glazed surface. The pad face looks shiny and feels slick or hard. This happens when heat and friction seal the foam's surface — essentially melting the cell structure closed. A glazed pad won't grab product, won't cut, and slides across the paint without doing anything useful. You'll feel it immediately: the pad moves too freely and the paint doesn't change.
Torn, chunked, or delaminating foam. Any visible physical damage — chunks missing from the pad face, tears in the foam, the foam layer separating from the Velcro backing. A damaged pad applies pressure unevenly and can leave marks on the paint. The moment you see structural damage, the pad is done.
Edge wear preventing flush contact. The edges of the pad are worn down, rounded, or compressed from repeated use. This matters because the edge of the pad does a lot of work — if it's not making flush contact with the paint, you're getting uneven correction along the perimeter of every pass. You'll see this as inconsistent results near body lines and edges.
Compressed flat — won't spring back. Press the pad with your thumb. A healthy pad springs back immediately. A worn pad stays compressed, or springs back slowly and not completely. Compression means the foam has lost its resilience, which means it's not distributing pressure evenly across its face anymore. Uneven pressure means uneven cut, which means holograms.
A worn pad is the most common hidden cause of hologram patterns after correction. Everything else can be perfect — good product, right speed, proper technique — and if the pad is shot, you'll still see holograms under direct light. When results suddenly get worse for no obvious reason, check the pad first.
Building Your Pad Kit
You don't need dozens of pads. You need the right ones and enough of each to get through a full detail without running a spent pad.
A practical starting kit for someone doing regular corrections:
- 2-3 cutting pads (5-6"), foam or microfiber depending on your preference
- 3-4 polishing pads (5-6") — you'll use these the most
- 2-3 finishing pads (5-6")
- 1-2 of each in 3" for tight areas
- 1 finishing pad dedicated to sealant/glaze application — don't use your polishing finishing pads for this
Keep your correction pads and your application pads separate. A finishing pad that's been used with polish still has trace abrasive in it. That's fine for finishing after correction, but not ideal for applying a sealant or glaze where you want zero cutting action. Dedicate one or two finishing pads to product application only and label them so you don't mix them up.
Buy within one brand system so the color coding is consistent and you always know what you're grabbing. Store pads clean and dry in a sealed container or bag — dust, debris, and garage grit are the enemy. A piece of sand embedded in a polishing pad will put a scratch in every panel you touch.