
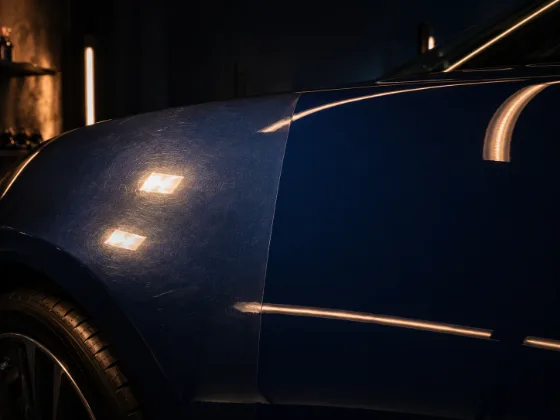
Paint correction is the process of removing surface defects from clear coat by abrading away the damaged layer and leaving a level, reflective surface. The number of "stages" refers to how many different abrasive steps you use to get there: one product combination (single-stage) or two product combinations in sequence (two-stage).
The choice between them isn't arbitrary — it depends entirely on the current condition of the paint. Get it right and you fix the problem in the minimum time with the minimum clear coat removal. Get it wrong and either you don't fix the problem at all, or you do unnecessary work and take more clear coat than you needed to.
What Single-Stage Correction Is
Single-stage paint correction uses one abrasive product and pad combination to address the paint's defects and produce a finished result in a single pass. The product chosen is aggressive enough to fix the problem but fine enough to leave a finish that looks clean without a second refining step.
Single-stage correction is appropriate when the defects are minor enough that a finishing product removes them cleanly. Light swirl marks, surface haze, minor water spots, mild oxidation — defects that live close to the surface of the clear coat and don't require heavy cutting to reach.
The advantage of single-stage is obvious: one product, one pass, done. It's faster, uses less product, and removes less clear coat material (which matters for paint longevity). If the paint only needs minor work, doing a full two-stage correction takes more time and removes more clear coat than the situation requires.
The limitation of single-stage: if the defects are deeper than your chosen product can reach in a single pass, single-stage correction will improve the appearance without fully addressing the problem. You'll see a partial improvement — some defects removed, others still visible — and assume you need more aggressive product when you might actually just need to do the proper two-stage process.
What Two-Stage Correction Is
Two-stage paint correction uses two sequential product and pad combinations. Stage one is the aggressive cut — a compound on a cutting pad that removes significant material and addresses deep defects. Stage two is the refining step — a finishing polish on a softer pad that removes the scratches left by the compound and brings the paint to a high-gloss final finish.
Two-stage is appropriate when the defects are too deep for a single finishing product to fully address — deep swirl marks, significant scratches, moderate to heavy oxidation, water etching, sanding marks.
After stage one (compounding), the paint looks dramatically better — the original defects are gone — but there's visible haze and fine scratches from the compound abrasive itself. This is expected. Stage two (polishing) removes this compound haze and produces the final clean, deep, high-gloss result.
The advantage of two-stage is thoroughness. It handles defects that a single product can't address and produces a more refined final finish than most single-stage approaches. The limitation is time and clear coat cost: it takes longer and removes more material per session.
How to Assess Your Paint
The correct approach depends on accurately reading the paint's current condition. Here's how to do it:
Step 1: Clean and decontaminate thoroughly. Surface contamination mimics paint defects — a dirty panel with iron fallout and water spots will look worse than the bare paint underneath actually is. Wash properly, use an iron remover, clay bar if the surface feels rough. You can't accurately assess paint condition through contamination.
Step 2: Inspect under direct bright light. Bright single-source light (detailing light, direct sun, bright fluorescent) reveals swirl marks and scratches that are invisible under diffuse lighting. Look at each panel from a low angle and rotate your position around it to see the full extent of the defects.
Step 3: Identify the types of defects present.
- Fine swirl marks / light haze visible only in direct light: single-stage candidate
- Moderate swirl marks visible at normal viewing angles: assess with a test spot
- Deep scratches, significant oxidation, heavy swirl marks visible in indirect light: two-stage required
- Water etching, sanding marks, buffer trails from previous correction: typically two-stage required
Step 4: Run a test spot. If you're unsure whether single or two-stage is needed, don't commit the whole car to your assumption. Pick a 12x12 inch test area on a less-visible panel and run your chosen product combination on that area to see the result before you commit to the full vehicle. A test spot costs you five minutes and tells you exactly what the product does to that paint.
Clear Coat Thickness and Why It Matters
Every time you polish paint, you remove clear coat material. You start with typically 50–100 microns of clear coat (this varies by manufacturer and model year). Each correction session removes some — a few microns for a light polish, more for an aggressive compound stage.
This is why using the minimum aggressiveness required to fix the problem matters. A two-stage correction when single-stage would have worked removes more clear coat than necessary. Three rounds of two-stage correction on a car over 10 years costs more clear coat than the paint can sustain without compromising the integrity of the protective layer.
A paint depth gauge measures clear coat thickness in microns and tells you how much you're working with. This is standard equipment for professional paint correction and worth understanding even for serious DIY detailers. Knowing your clear coat thickness prevents the worst outcomes — burning through clear coat into the base coat, which requires repaint rather than correction.
Special Cases
Single-stage paint (older vehicles). Pre-1980s vehicles and some vehicles up to the mid-1990s have single-stage paint — the color and protective layers are combined in one coat without a separate clear coat. Correcting single-stage paint is different from correcting clear coat: you're cutting directly into the color layer, and the painting smears color when worked (color transfer on the pad is normal). The approach is similar but requires awareness that there's no separate clear coat to work within.
Factory paint defects. New cars sometimes arrive with paint defects from the factory — installation scratches, transport damage, dealer-applied protection film adhesive residue. These can often be addressed with a single-stage or targeted correction rather than a full two-stage. Inspect new vehicles carefully before taking delivery.
Paint that's been over-corrected previously. If a car has been compounded aggressively in the past and doesn't have much clear coat remaining, two-stage correction may not be an option even if the defects warrant it. In these cases, single-stage with the finest product that still addresses the defects is the right approach, and acceptance of some remaining defects may be necessary to preserve the remaining clear coat.
After Correction: Protection Is Non-Negotiable
Whether you do a single-stage or two-stage correction, the corrected paint is immediately more vulnerable than paint with protection on it. Apply protection — wax, sealant, or ceramic coating — within a day of completing correction.
The investment of time in paint correction is wasted if the fresh paint surface is exposed to contamination, UV, and the elements without protection. The paint that was just corrected and protected correctly will hold that result for years. The same freshly corrected paint without protection will degrade quickly back toward what it looked like before you started.
The Decision Tree
In practice:
- Light defects only (mild swirls, surface haze, minor water spots): try single-stage first
- Moderate defects: run a test spot with a single-stage approach; if it fully addresses the defects, you're done; if it improves but doesn't fully correct, move to two-stage
- Significant defects (deep swirls, scratches, oxidation): plan for two-stage from the start
- Unknown condition: always run a test spot before committing
The goal isn't to do the most correction — it's to do enough correction to achieve the result you want, using the minimum clear coat removal necessary to get there.