
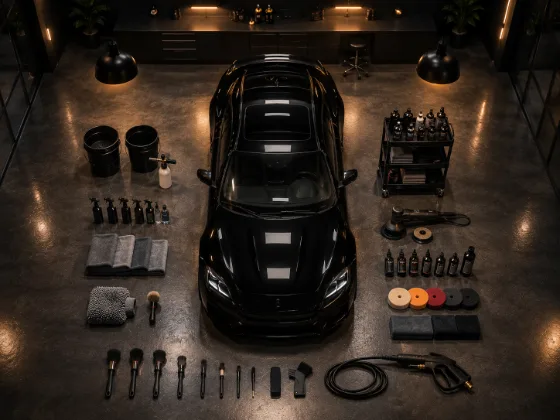
One of the most common questions beginners ask is: where do I start? Not what products to buy, not what machine polisher to get — just what to actually do first, and in what order.
Order matters in detailing. Some steps enable the next one. Some steps, done out of sequence, make more work. This is the order that makes sense, and the reason behind each step.
Before You Touch the Car: Set Up
Park in the shade. Working in direct sun means your products dry before you can buff them off, water spots form faster, and the panels get hot enough to affect chemistry. Shade isn't optional — it's a prerequisite for good results.
Gather everything before you start. Buckets, mitt, towels, products, brushes, hose. Stopping mid-detail to find something lets panels dry unevenly and breaks your momentum.
Do a quick walk-around. Note any damage, deep scratches, or problem areas so you're not surprised by them mid-detail. If a panel has fresh bird dropping damage or paint chips, you want to know before you start, not after you've put wax over them.
Step 1: Wheels and Tires First
Always start with wheels. Wheels are the dirtiest part of the car — brake dust, road grime, grease, and metal particles from the rotors. If you wash the car body first and then do the wheels, you'll splash contaminated water and product from the wheels onto paint you just cleaned.
Rinse the wheels and wheel wells thoroughly. Apply your wheel cleaner and let it dwell for 30–60 seconds. Agitate with a wheel brush — a long-handled one for the barrel, a brush or mitt for the face. Rinse completely. Do all four wheels before moving on.
Then clean the tires with a stiff brush. Rinse and leave them wet for now — you'll dress them at the end.
Step 2: Pre-Rinse the Body
Before you apply anything or touch the paint, rinse the entire car thoroughly from top to bottom. You're knocking loose the heaviest contamination — dust, pollen, loose dirt, dried bug splatter — before any product goes on. Use good water pressure but don't aim straight at rubber seals or drainage gaps.
Pay extra attention to the rocker panels, lower doors, rear bumper, and front grille. These accumulate the heaviest road debris.
Step 3: Pre-Wash
This is the step most beginners skip, and it's one of the most important. A pre-wash is a chemical you apply to the wet car — before contact washing — to break down road film, grease, and contamination. Let it dwell for 60–90 seconds, then rinse it off.
The purpose: reduce the load on your wash mitt. Every bit of contamination that comes off in the pre-wash rinse is contamination that won't be dragged across your paint by your mitt during the contact wash. This is one of the key mechanisms for washing without scratching.
Step 4: Two-Bucket Contact Wash
Now you contact the paint. Two buckets — one with shampoo solution, one with clean water for rinsing your mitt. After each panel, dip your mitt in the rinse bucket first, agitate it to release the grit you just picked up, then reload it from the soap bucket.
Work top to bottom. The roof is cleanest; the rocker panels are dirtiest. You're washing downward so grime runs down and away, not onto panels you've already cleaned.
Straight-line motions only. Fold-over technique on the mitt: use one side for the panel, flip to the clean side for the next. Rinse the mitt before reloading — every time, without exception.
Rinse each panel as you go if you're working in warm conditions. Shampoo drying on paint leaves residue that's a pain to remove.
Step 5: Final Rinse
Rinse the entire car with good water flow. If you have a hose nozzle that lets you do a "sheeting" rinse — laying the hose flat and letting water sheet off the panels — this reduces water spots and speeds drying significantly.
Step 6: Drying
Dry quickly. Water sitting on paint, especially in sunlight, leaves mineral deposits that etch into the clear coat over time. Use a dedicated microfiber drying towel — large, plush, waffle-weave is ideal. Blot or wipe in straight lines, top to bottom.
Use a leaf blower or car dryer to remove water from door jambs, side mirrors, fuel door gaps, and anywhere water pools and drips out after you've dried the panels. Nothing is more frustrating than finishing a dry and then water streaming down from the door seal leaving fresh water spots.
Step 7: Interior
Most people do interior first or last based on habit. We recommend exterior first, interior second — that way you're not carrying interior product residue outside, and if you're using any chemical that off-gasses (carpet cleaners, upholstery sprays), you can leave the doors open while the exterior dries.
Interior order: remove trash and loose items, vacuum everything (seats, carpet, floor mats, door pockets), then work surfaces from top to bottom. Dash, then door panels, then center console, then seats, then carpet. Glass last — always glass last, so any dust or product overspray from other surfaces gets cleaned up rather than added under a fresh glass wipe.
Step 8: Protection
On a clean, dry car, apply your protection product. Spray wax is the most beginner-friendly option — spray on, buff off, done in ten minutes. It goes on the paint, the trim, the side mirrors, the hood — anywhere paint or plastic is exposed.
Apply tire dressing to clean, dry tires. A little goes a long way — apply, work it in, wipe off the excess. You want a consistent satin finish, not a greasy layer that flings onto your fenders when you drive.
Step 9: Glass
Interior and exterior glass last. Use an automotive glass cleaner — not the blue stuff from the hardware store. Wipe in straight lines. Two passes: one with the product, one with a clean dry towel. On the exterior, use a different face of the towel than you used for the interior — the film that builds up on the inside of the windshield is different from exterior road grime, and cross-contaminating the towel just moves it around.
Step 10: Final Inspection
Walk around the car in good light and look at it critically. Check for missed spots, streaky glass, product residue in trim gaps, water drips from door gaps, tire dressing on the paint. It's much easier to catch these things at the end than to find them a week later.
The final inspection isn't optional. It's the habit that separates a detail that looks good from a detail that actually is good.
How Long Should This Take?
A full exterior and interior detail, done correctly, takes three to five hours for a regular-sized car if you're new to it. It gets faster as the process becomes automatic. Don't rush it — rushing is how you miss steps, and missed steps are why the car looks only okay instead of great.
Your first few details will take longer. That's fine. The goal is to learn the process, not to set a speed record.